Search for answers or browse our knowledge base.
-
Retro C
-
-
- Articles coming soon
-
- How to Replace the Retro C's Computer
- Configuring the Touchscreen Computer's "Power-On"
- How to replace micro USB on the display computers
- How To: Transfer Files to the Retro C
- How to replace the USB hard drive on the touch screen computer
- New computer set bios power on
- Old computer set bios to power on
- TouchScreen Flip / Mirror Issue
-
-
-
- Stuck Angle or Centerline - How to Recover & Recalibrate
- Replacing an Angle Encoder
- Angle movements over run when going to position.
- Angle (Arch) Movements - Overview
- Angle Chains - Proper Chain Tension
- Diagnosing Unknown Noises Coming from Blade Motor
- Pivot Point Check
- Power or Wiring Troubleshooting for Angle Motors or VFDs
-
- Stuck Angle or Centerline - How to Recover & Recalibrate
- How To: Calibrate Centerline 1-5
- How To: Calibrate Centerline 1-5 (Advanced)
- Centerline (Vertical) Movements - Overview
- Replacing a Centerline Encoder
- Replacing a Centerline Gearbox
- Checking the Centerline Maximum & Minimum (Max & Min) Height Setting
- How to Tighten the Centerline Slides
- How To: Tension The Centerline Chains
-
-
-
- Common Retro C issues and solutions
- Countdown Timer / E-Stop Troubleshooting
- Scrap Belt or Scrap Incline VFD Disconnected: Troubleshooting
- Stuck Angle or Centerline - How to Recover & Recalibrate
- TouchScreen Flip / Mirror Issue
- Troubleshooting: Encoder Unplugged Error
- Troubleshooting: The Stationary or Carriage Side Horizontals Won't Move Anymore
-
-
Linear Pickline
-
Plant One Projection
-
SmartConveyor
-
Sticker Printer
Centerline (Vertical) Movements – Overview
Centerlines are saw blade movements on the Y Axis (vertical movements – up & down).
All Retro C component saws contain one of two versions depending on the generation of the saw.
- Version 1 is the Joyce Actuator which is an enclosure screw that moves up and down.
- Version 2 is a gearbox with #50-2 chain to move the centerline to the correct position.
Both versions have an encoder under a gray cover on the top of the machine. The encoders must be secure in order to keep calibration and at times either the set screw will get loose or the spring clips may break. They must be repaired if broken to avoid errors and loss of calibration.
Version 2
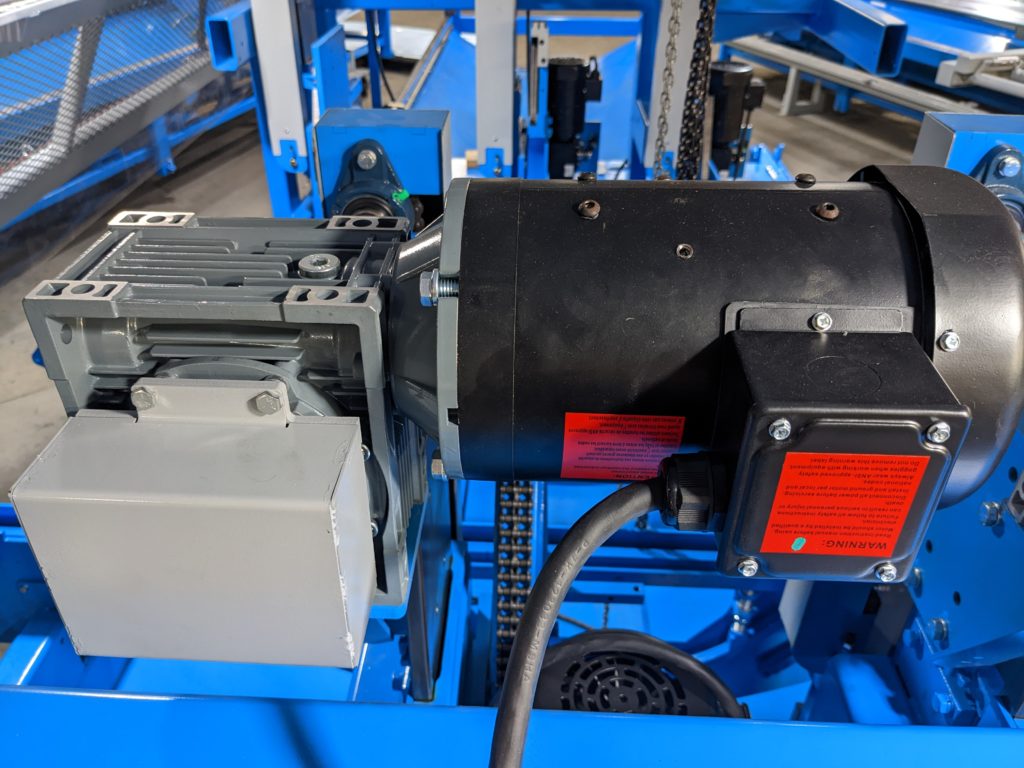
This centerline has 4 major components to it Motor, Gearbox, Encoder and Chain. The encoder is mounted on the opposite side as the chain on the end of the shaft under the cover shown below. The wiring for the motor enters directly next to it as shown below. The Gearbox is the gray unit in the picture below.
The Chain is on the outside under a gray cover that moves the unit up and down to position.
