How Can We Help?
Search for answers or browse our knowledge base.
Kindle Fire 8 Configuration
Enventek chose to use the Amazon Fire 8 Kids tablets specifically because they come with a rugged bumper case attached and are cost-effective and easily replaced. During the setup process outlined below, you will remove all the kid settings and turn your tablet into a standard Fire 8 tablet for use with the Linear Pickline.
- Step 1: Turn on the power.
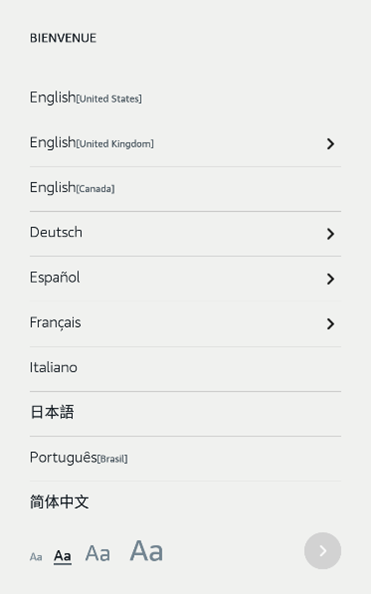
- Step 2: Choose your default language.
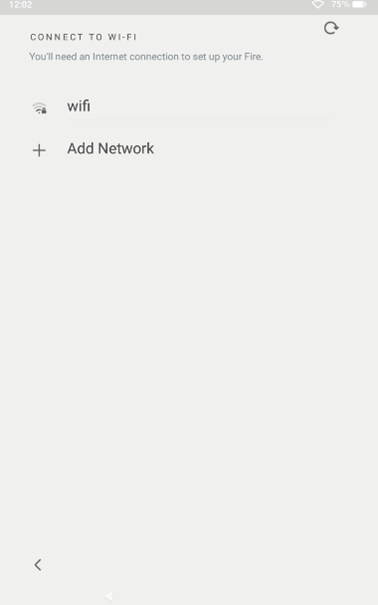
- Step 3: Connect to your wifi
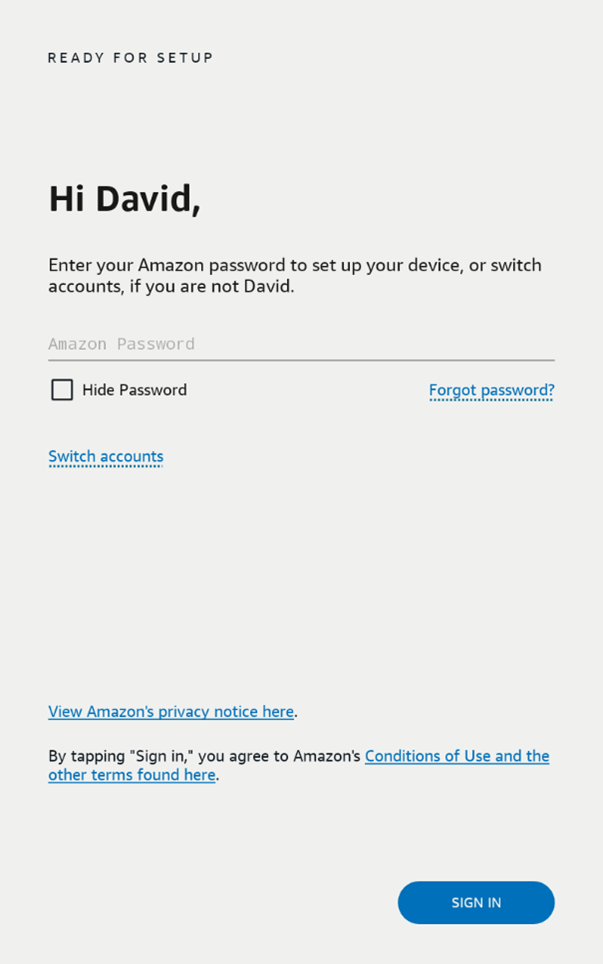
- Step 4: Log in to your existing Amazon account or create a new account and log in. NOTE: This is only a temporary login. This step is required to set up the device as an “adult” version. Later on, we will deactivate the device.
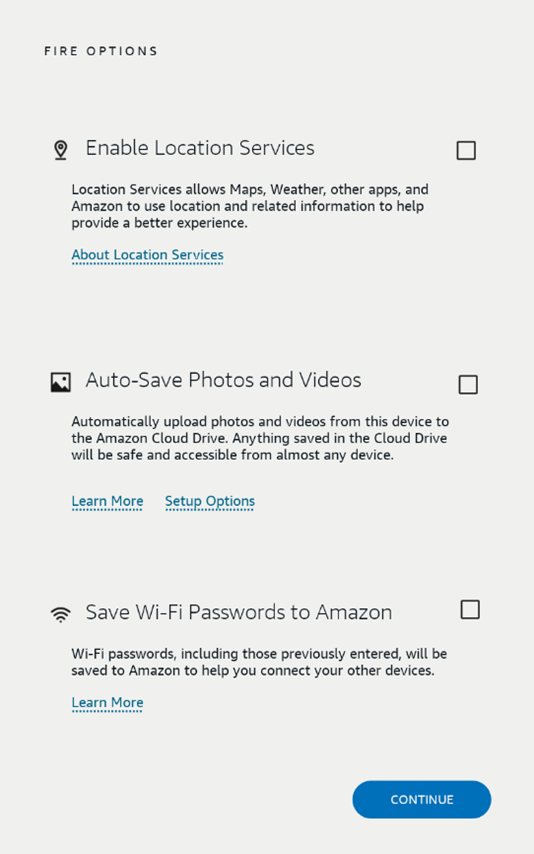
- Step 5: Deselect all amazon extras. Such as Location, Photos, and Passwords.
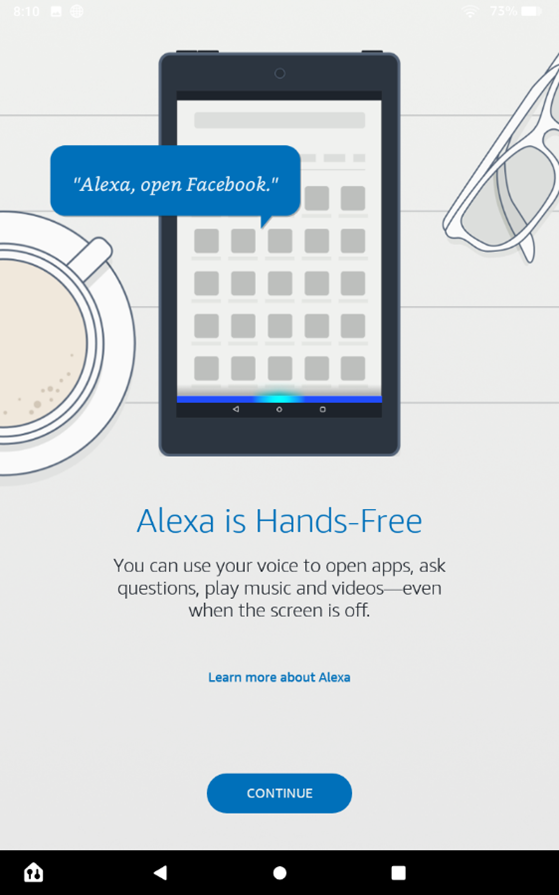
- Step 6: Watch Amazon’s marketing video. NOTE: You can skip to the end of the video by dragging the slide bar at the bottom of the screen to the right.
- Step 7: Select “Activate Amazon Kids+” (it is the only option).

- Step 8: Enter any pin, we suggest 1111. In one of the upcoming steps, we will remove the pin, this is just temporary.
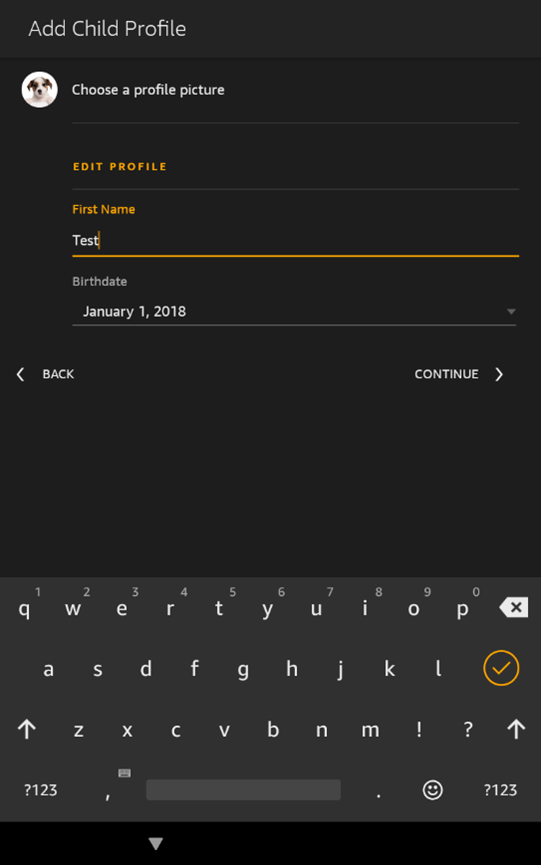
- Step 9: Add any name and any birthdate, it will be removed shortly.
- Step 10: When given the option do NOT add any extra kid friendly options.
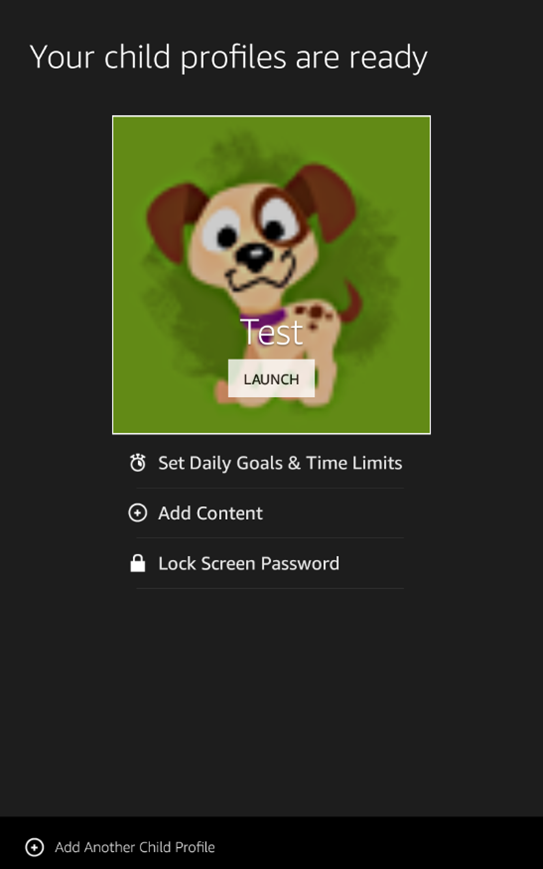
- Step 11: Launch the “kid” profile you created.
- Step 12: When given the option do NOT add Alexa.
- Step 13: Swipe down from the top menu in the kid’s menu to get the change profile button.
- Step 14: Type in the pin you created in step 8 to exit “kid” mode
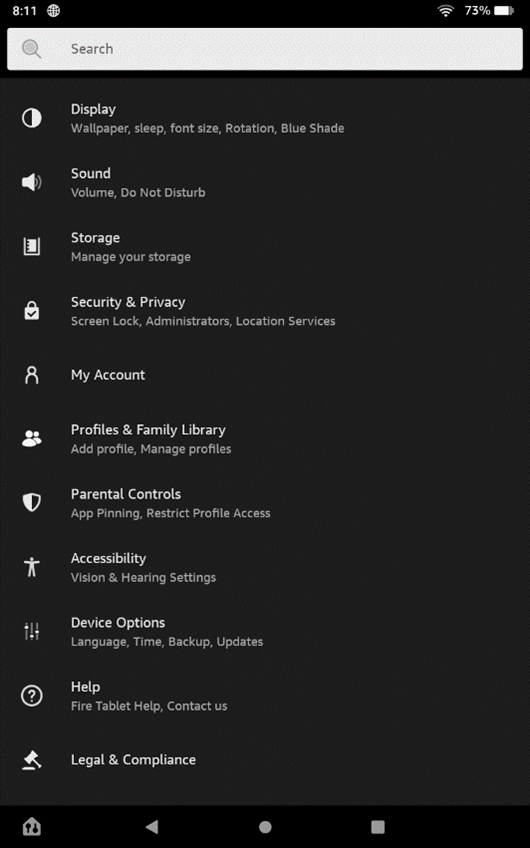
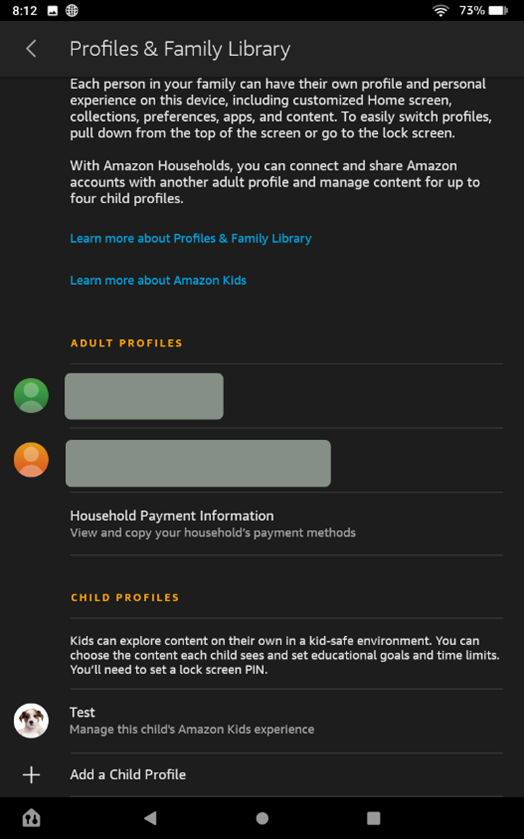
- Step 15: Go to “settings”, and then “Profiles & Family Library”
- Step 16: Remove the child’s profile you created by scrolling to the bottom and pressing on the “name”
- Step 17: Select “Remove Child Profile”
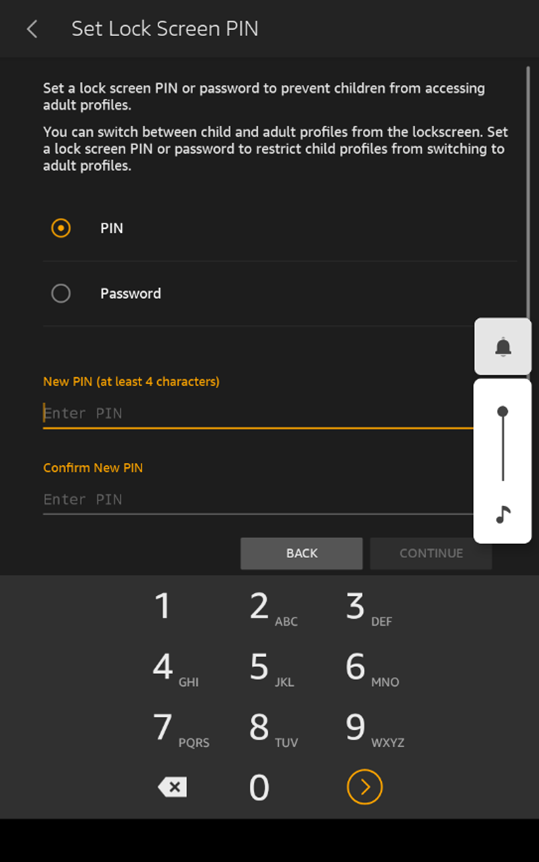
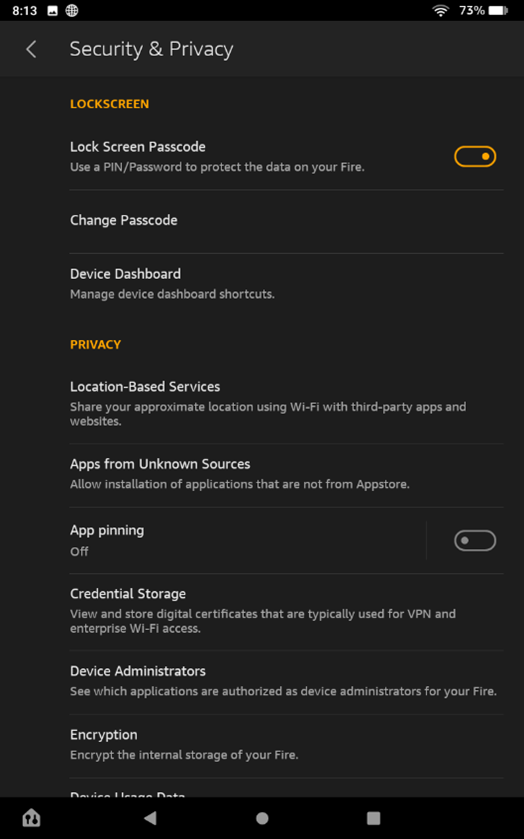
- Step 18: Go back one menu in “settings” and select “Security & Privacy”.
- Step 19: In the “Security & Privacy” menu uncheck “Lockscreen Passcode”.
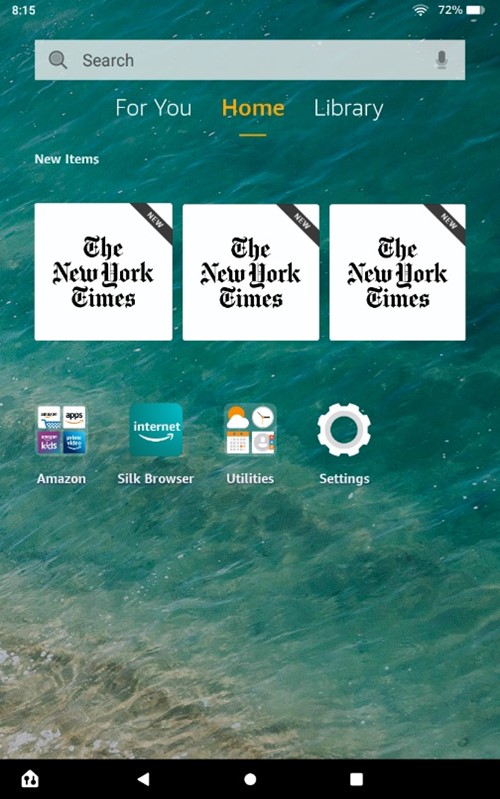
- Step 20: Clean up the icons on the main screen by grouping them into a new folder called “Amazon Folder”
- Step 21: To create a folder called “Amazon Folder” touch and drag one icon onto another
- Step 22: Type the name of the folder “Amazon Folder”
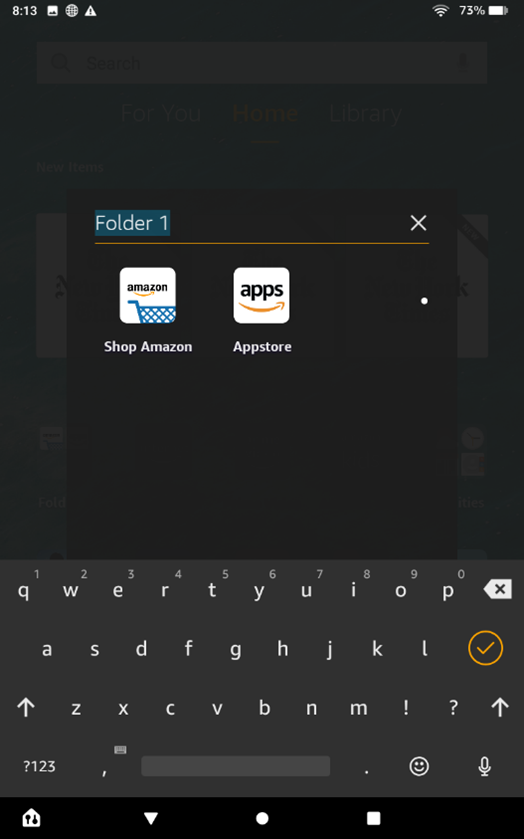
- Step 23: Repeat the last step until the desktop is clean of icons, the goal is to simplify the system since the “Silk” browser is the only icon you want on the desktop.
- Step 24: Deregister the device by going to “settings” and then “My account”. Click on “Deregister”.
After the device has been deregistered it will still be usable, the tablet is now set up.