How Can We Help?
Search for answers or browse our knowledge base.
-
Retro C
-
-
- Articles coming soon
-
- How to Replace the Retro C's Computer
- Configuring the Touchscreen Computer's "Power-On"
- How to replace micro USB on the display computers
- How To: Transfer Files to the Retro C
- How to replace the USB hard drive on the touch screen computer
- New computer set bios power on
- Old computer set bios to power on
- TouchScreen Flip / Mirror Issue
-
-
-
- Stuck Angle or Centerline - How to Recover & Recalibrate
- Replacing an Angle Encoder
- Angle movements over run when going to position.
- Angle (Arch) Movements - Overview
- Angle Chains - Proper Chain Tension
- Diagnosing Unknown Noises Coming from Blade Motor
- Pivot Point Check
- Power or Wiring Troubleshooting for Angle Motors or VFDs
- Dirty Slide
-
- Stuck Angle or Centerline - How to Recover & Recalibrate
- How To: Calibrate Centerline 1-5
- How To: Calibrate Centerline 1-5 (Advanced)
- Centerline (Vertical) Movements - Overview
- Replacing a Centerline Encoder
- Replacing a Centerline Gearbox
- Checking the Centerline Maximum & Minimum (Max & Min) Height Setting
- How to Tighten the Centerline Slides
- How To: Tension The Centerline Chains
-
-
-
- Common Retro C issues and solutions
- Countdown Timer / E-Stop Troubleshooting
- Scrap Belt or Scrap Incline VFD Disconnected: Troubleshooting
- Stuck Angle or Centerline - How to Recover & Recalibrate
- TouchScreen Flip / Mirror Issue
- Troubleshooting: Encoder Unplugged Error
- Troubleshooting: The Stationary or Carriage Side Horizontals Won't Move Anymore
-
-
Linear Pickline
-
Plant One Projection
-
SmartConveyor
-
Sticker Printer
< All Topics
Print
GS1 & GS2
Updated
- Power off.
- Remove old drive take note of where the wires are exactly.
- Install new drive put wires back in the exact same location.
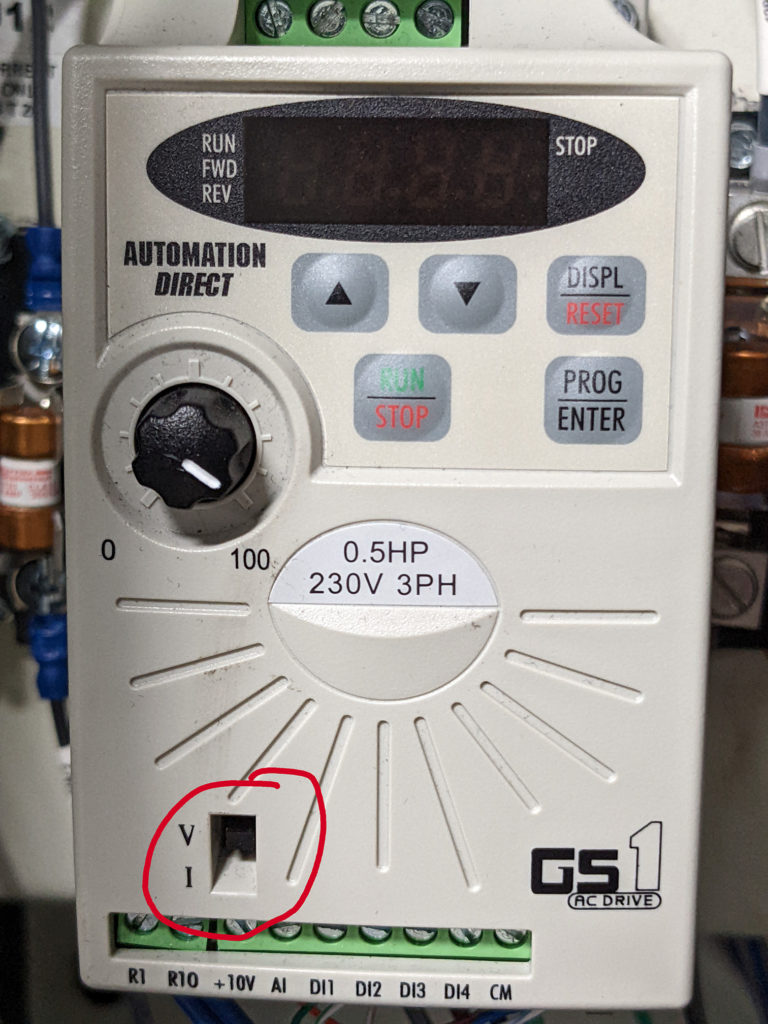
- Make sure that on the GS1 the dip switch is in the up position.
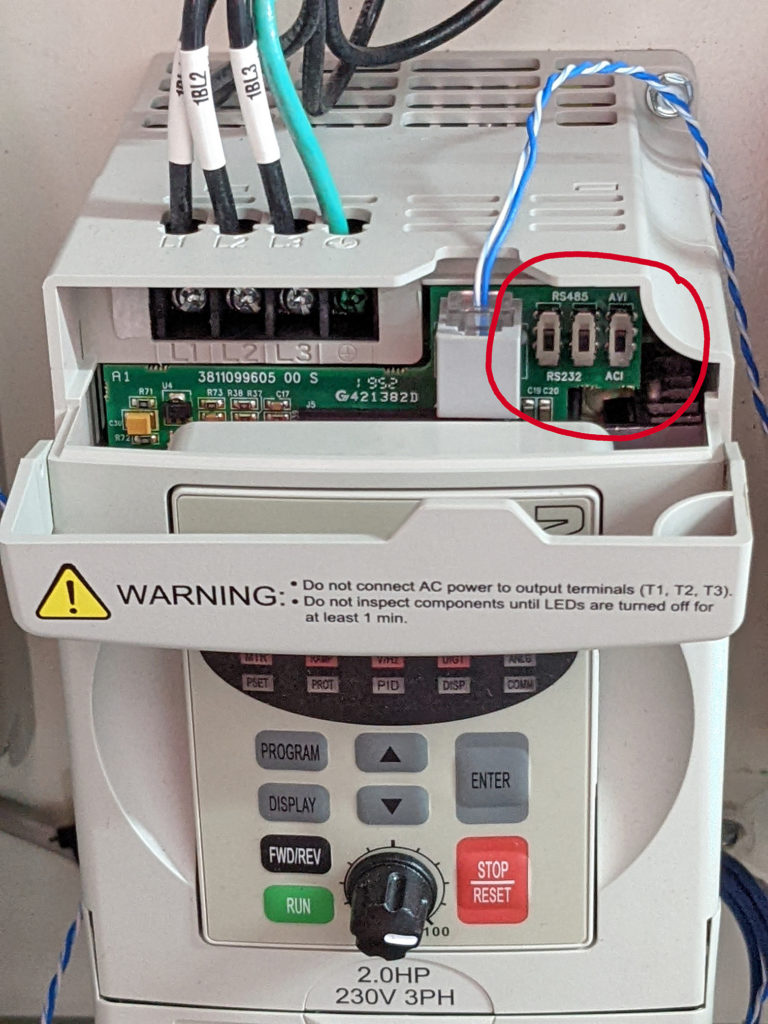
- On the GS2 all 3 switches need to be in the up position.
- Power up
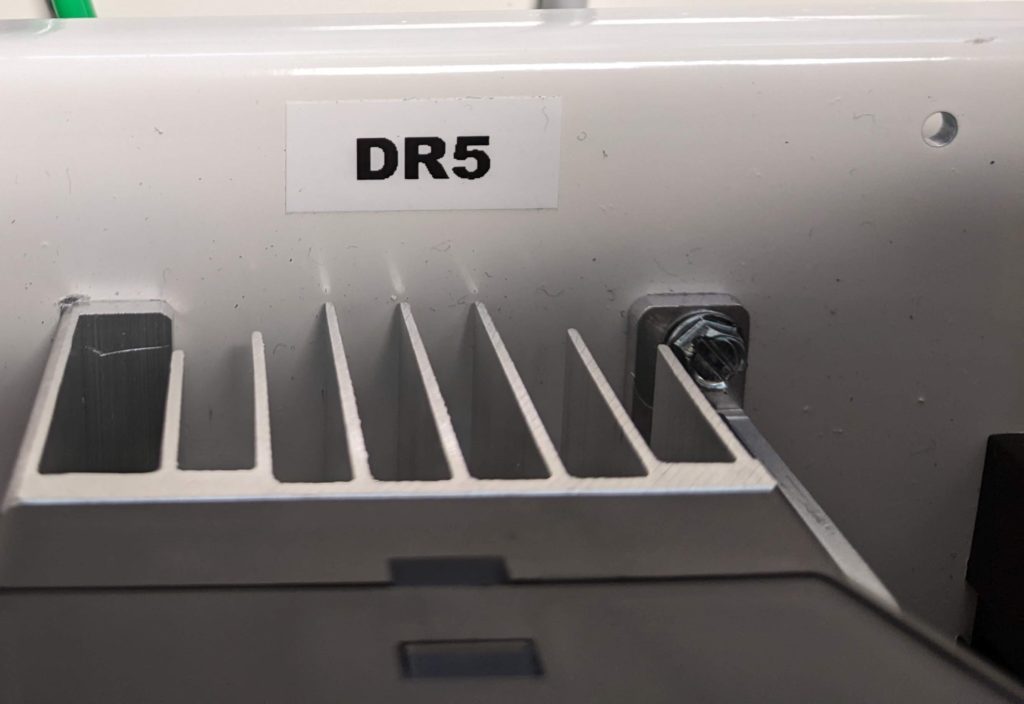
- Set settings. 09-00 = <Axis number> (See label DRxx)
For example if the DR Label is DR20 you would put 20 into 9-00.
The Axis number the number after the text.
Component labels work as follow DR=Drive FU=Fuse V=VC1 etc.
In this case you will be replacing a drive next to the drive will be a component label. See Below
Set Setting 9-01 = 2
Set Setting 9-02 = 4
HOW TO FACTORY RESET GS1: 9-08 = 99
GS1 Steps
1. Press Program
2. Use the Up/Down buttons until you reach 9-
3. Press Program/Enter
4. 9-00 should be selected. Press Enter
5. Select <axis number> with arrow keys then press enter.
6. 9-01 should be selected press enter.
7. Select 2 with arrow keys press enter.
8 9-02 should be selected press enter.
9. Select 4 with arrow keys press enter.
10. Restart controlling software
Table of Contents