
Search for answers or browse our knowledge base.
Checking the Material Feed Arm and Carriage Alignment
Before You Begin
Safety: Stop the machine, follow the site lockout/tagout procedure, verify that hazardous energy is controlled, and release or secure stored mechanical and pneumatic energy before opening a panel, removing a guard, or adjusting components. Electrical work must be performed by a qualified technician.
Checking the saw alignment, while not difficult, needs to be done in the correct order to realign.
If the carriage moves during the cutting process it means one of two things. Either the Carriage air brake is not holding or the material feed conveyors are not parallel to each other
There are THREE possible sections that can & have been known to get out of alignment.
- Stationary Side Material feed arm (front/back) could be out of alignment if (A ≠ B) measurements are not equal.
- The Carriage itself could be twisted. Example: (A = B) and (E = F) but (C ≠ D) then the carriage is out of alignment.
- Carriage Side Material feed arms out of alignment if (front/back) E ≠ F.
NOTE: Always measure and align LEFT to Right
NOTE: print off this PDF file.
After you have printed this off please fill in the correct values for A,B,C,D,E,F. It will likely be helpful to look below at some of the pictures to get an idea of exactly where to measure to and from for each location.
If everything is aligned properly A = B, C = D, E = F if this is not the case then we need to realign one or more of the arms or the carriage itself.
Here are the Steps:
Step 1
Measure the distance between the saw frame and the conveyor arm at both ends. The measurements must match within 1/16 inch.
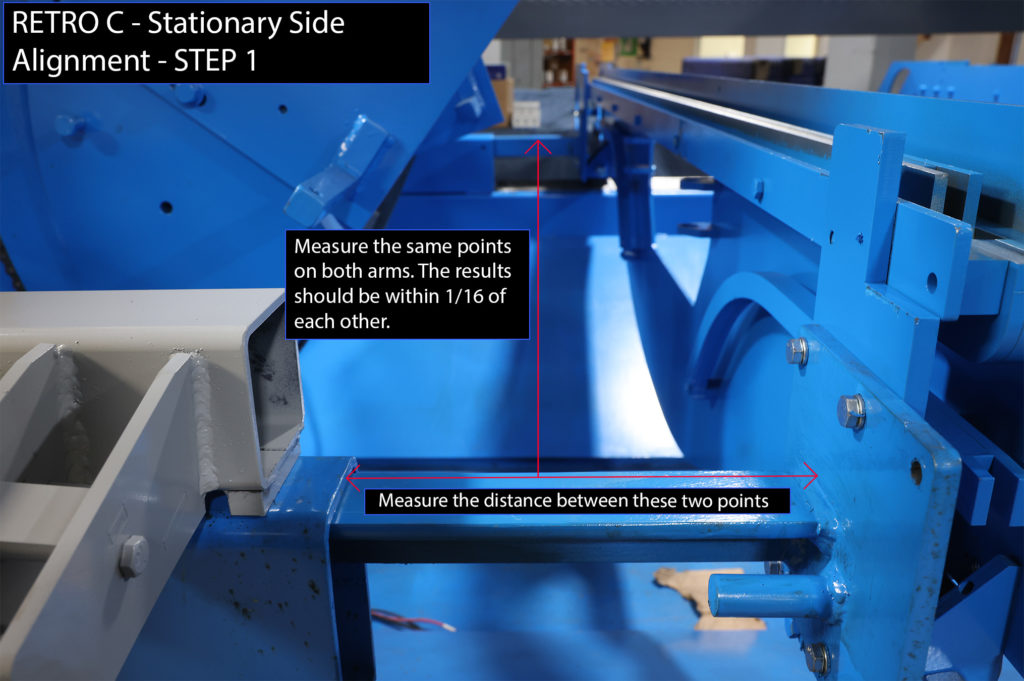
If the stationary-side measurements are the same, proceed to Step 2. If the measurements are off by more than 1/16 inch proceed to Step 4
STEP 2
Measure the distance between the Carriage side frame tube to the Material feed bracket.
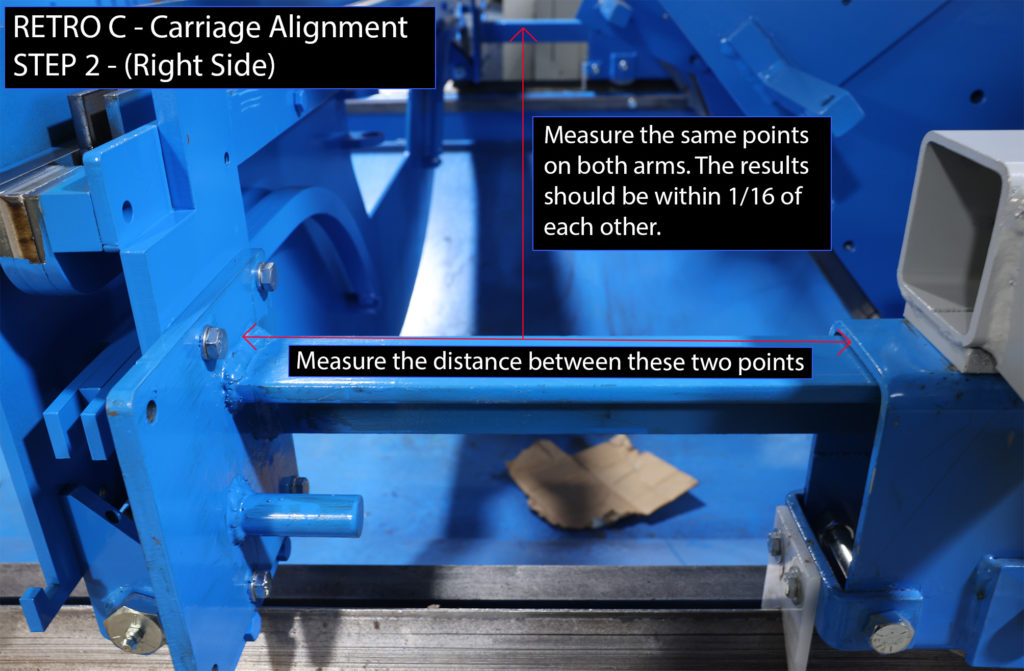
If the carriage-side measurements are the same, proceed to Step 3. If the measurements are off by more than 1/16 inch proceed to Step 4
Step 3
Measure the distance between the two carriage arms.
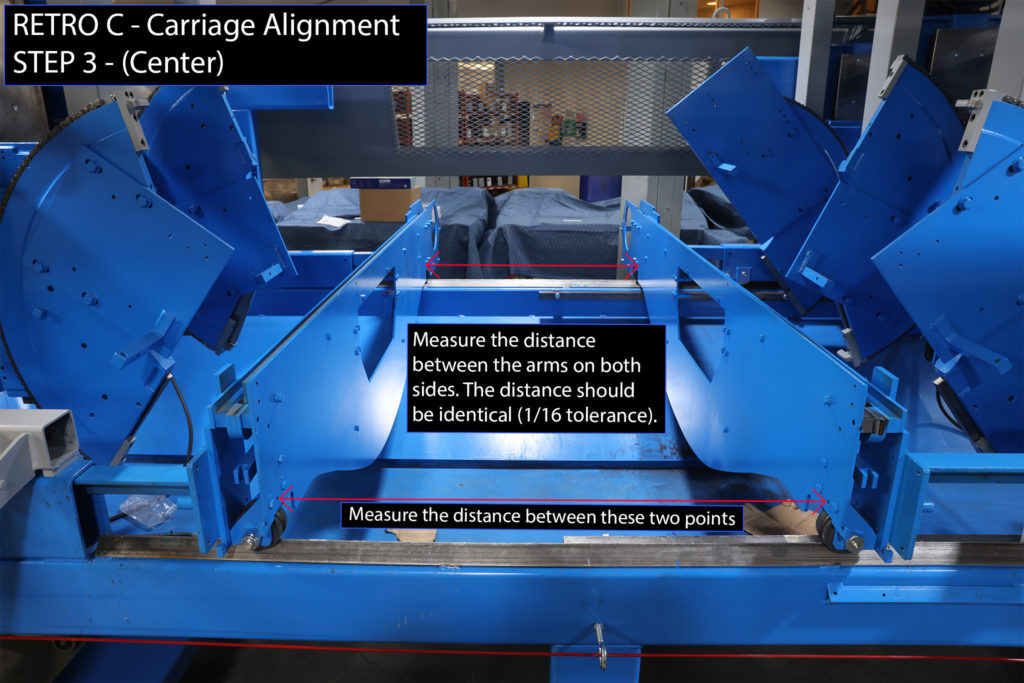
If the distance between the two carriage arms is the same, skip ahead to Step 5. If the measurements are off by more than 1/16 inch on Step 1, 2, or 3 proceed to Step 4.
Step 4 – Re-align the arms/carriage
NOTE: If you are having issues getting accurate measurements for the Carriage. You can measure the carriage alignment by moving the carriage to 20′ and measure to the end of the frame. Should measure about 2″.
Confirm the Result
After restoring the machine through the approved startup procedure, confirm that the position or count changes in the correct direction, returns consistently, and reaches the commanded value without an encoder, calibration, or overrun warning.
If the issue remains, record the exact on-screen message, affected component, indicator-light state, and the last change made. Provide those details to Enventek Technical Support; do not repeatedly recalibrate or replace parts without identifying the cause.