Search for answers or browse our knowledge base.
-
Retro C
-
-
- Articles coming soon
-
- How to Replace the Retro C's Computer
- Configuring the Touchscreen Computer's "Power-On"
- How to replace micro USB on the display computers
- How To: Transfer Files to the Retro C
- How to replace the USB hard drive on the touch screen computer
- New computer set bios power on
- Old computer set bios to power on
- TouchScreen Flip / Mirror Issue
-
-
-
- Stuck Angle or Centerline - How to Recover & Recalibrate
- Replacing an Angle Encoder
- Angle movements over run when going to position.
- Angle (Arch) Movements - Overview
- Angle Chains - Proper Chain Tension
- Diagnosing Unknown Noises Coming from Blade Motor
- Pivot Point Check
- Power or Wiring Troubleshooting for Angle Motors or VFDs
- Dirty Slide
-
- Stuck Angle or Centerline - How to Recover & Recalibrate
- How To: Calibrate Centerline 1-5
- How To: Calibrate Centerline 1-5 (Advanced)
- Centerline (Vertical) Movements - Overview
- Replacing a Centerline Encoder
- Replacing a Centerline Gearbox
- Checking the Centerline Maximum & Minimum (Max & Min) Height Setting
- How to Tighten the Centerline Slides
- How To: Tension The Centerline Chains
-
-
-
- Common Retro C issues and solutions
- Countdown Timer / E-Stop Troubleshooting
- Scrap Belt or Scrap Incline VFD Disconnected: Troubleshooting
- Stuck Angle or Centerline - How to Recover & Recalibrate
- TouchScreen Flip / Mirror Issue
- Troubleshooting: Encoder Unplugged Error
- Troubleshooting: The Stationary or Carriage Side Horizontals Won't Move Anymore
-
-
Linear Pickline
-
Plant One Projection
-
SmartConveyor
-
Sticker Printer
How To: Calibrate Centerline 1-5
There are a number of reasons you might need to recalibrate your centerline. The most common reasons are
- Older Retro C saws use screw drive centerlines that tended to fade down more than our latest chain drive systems.
- Loss of power while the saw head was moving.
- Crashing lumber against the saw head.
- Improper calibration (we’re all human, it happens).
Calibrating
The first step is to go to the “Repair” & then “Maintenance” tabs. Select the Centerline you want to calibrate & find a 2×4 that you can cut, measure it & subtract an inch or two, and put in the measurement in the popup window.
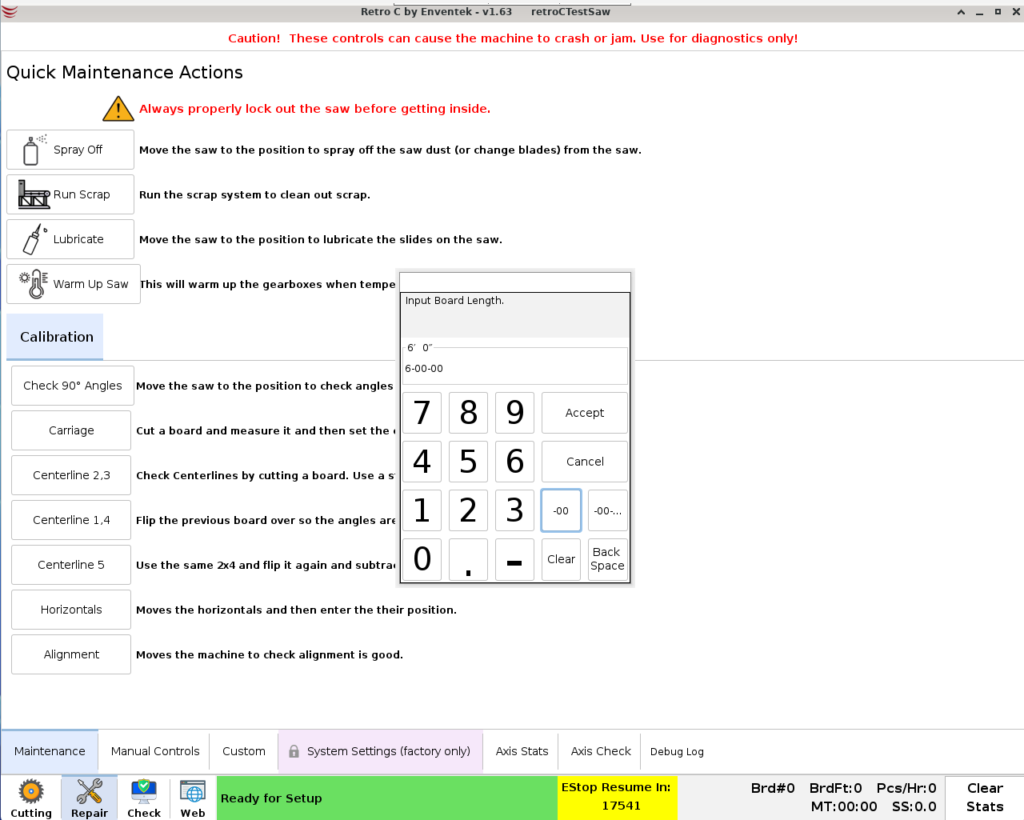
Press accept and another popup window will tell you, that to calibrate you will need to use the “move to position” button on the main “Cutting” tab.
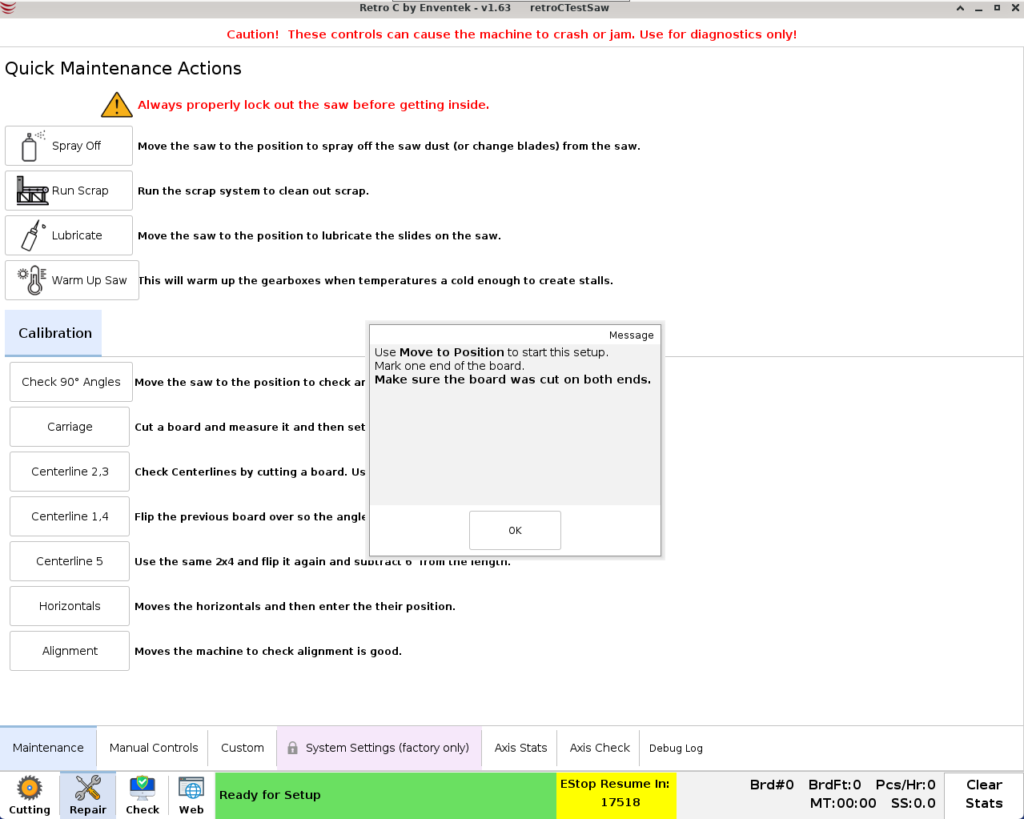
Press the “Move to Position” button on the main “cutting” tab, put your board in, and let it run through the blades and drop out the other side.
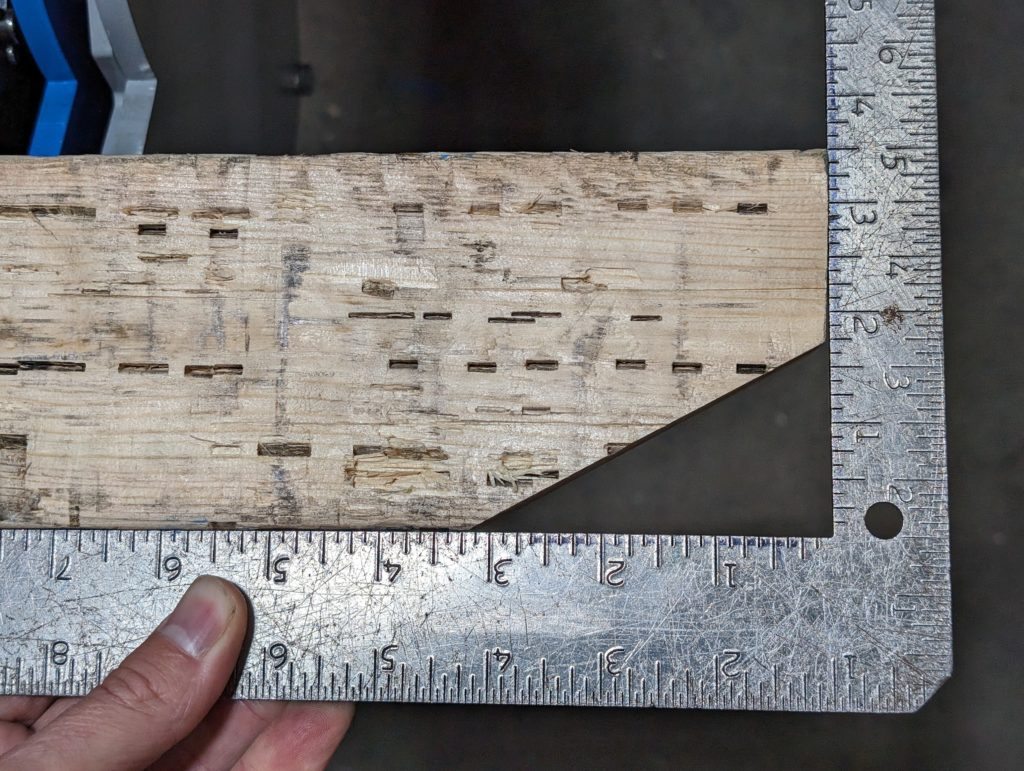
Use a square to measure the board.
Measuring Blades 1 & 4
Don’t forget that when you are measuring the 2×4 you just cut, you have to measure the correct side.
For example, when measuring saw blades 1 & 4 use a square and measure the space that is missing (the blade is bottom cutting) (in the image below no calibration is needed because it is perfect at 1-12).
Measuring Blades 2, 3 & 5
For blades 2,3 & 5 measure the opposite way (blades 2,3,5 top cut). In the image below the centerline is out of calibration, 1/4″ too high.
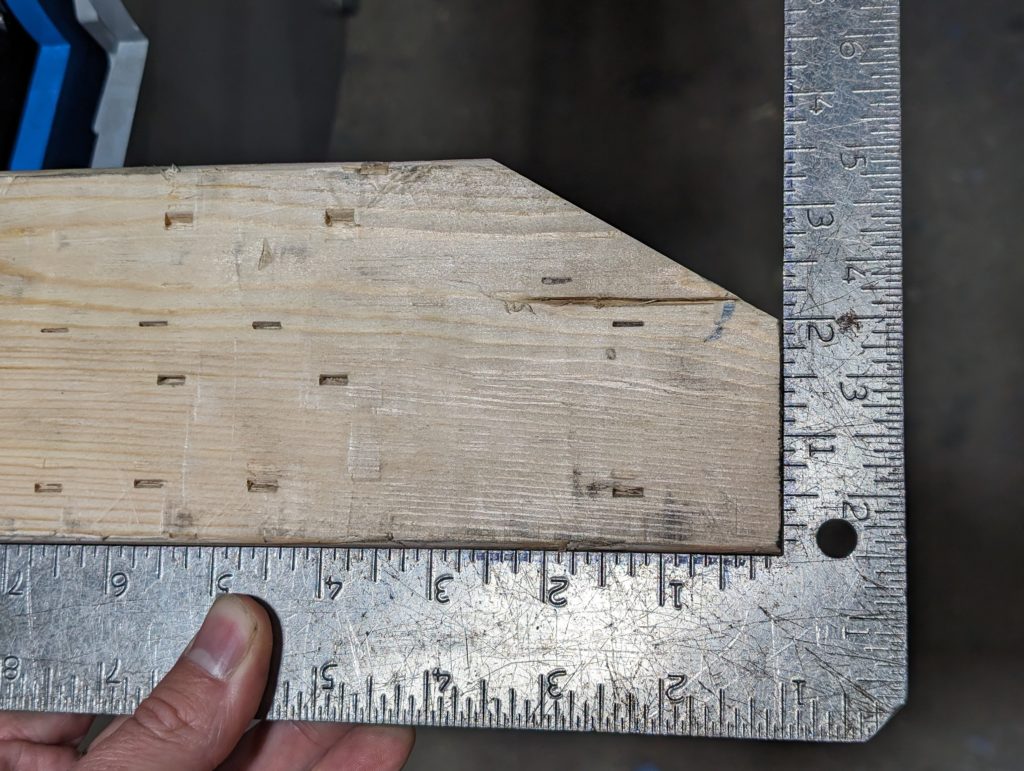
Since the calibration is off you will need to go back to the “repair” & then “Maintenance” tabs, press the set centerline button for the appropriate centerline, and input the actual amount you measured. In the example above I measured 2″ so I would put 0-2-0 (feet, inches, sixteenths) here.
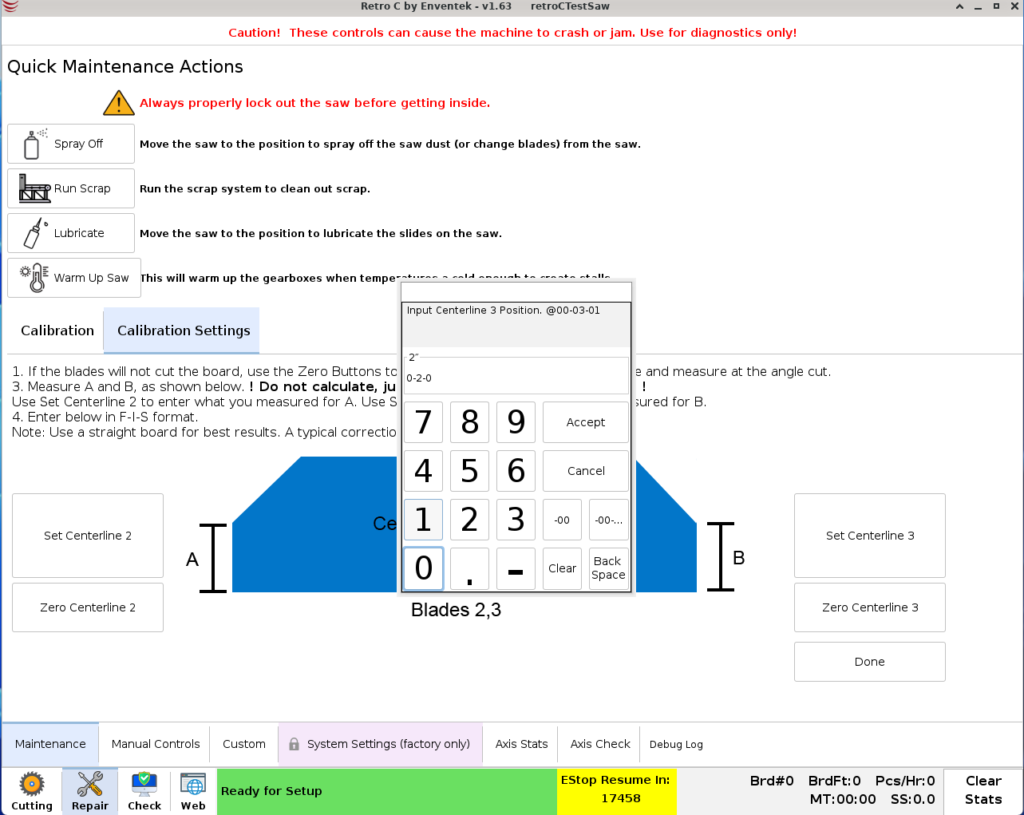
Press accept and then, cut and measure another board to verify that everything worked.