
Search for answers or browse our knowledge base.
Carriage Stalling, Hunting, or Losing Length After Calibration
Before You Begin
Confirm the machine model and the component or screen being serviced. Record the original condition so the result can be compared after the procedure.
Retro C: Carriage Movements Stalling or Hunting
If the Retro C carriage stalls or hunts at the end of a movement, follow these steps to resolve the issue
- Step 1: Clean dust and debris from the GearRack.
- Step 2: Ensure the carriage is square, and verify that both material feed arms are aligned properly using the guidelines in this article. Alignment Instructions
- Step 3: Inspect the chain tension. Is it too loose? Adjust as necessary.
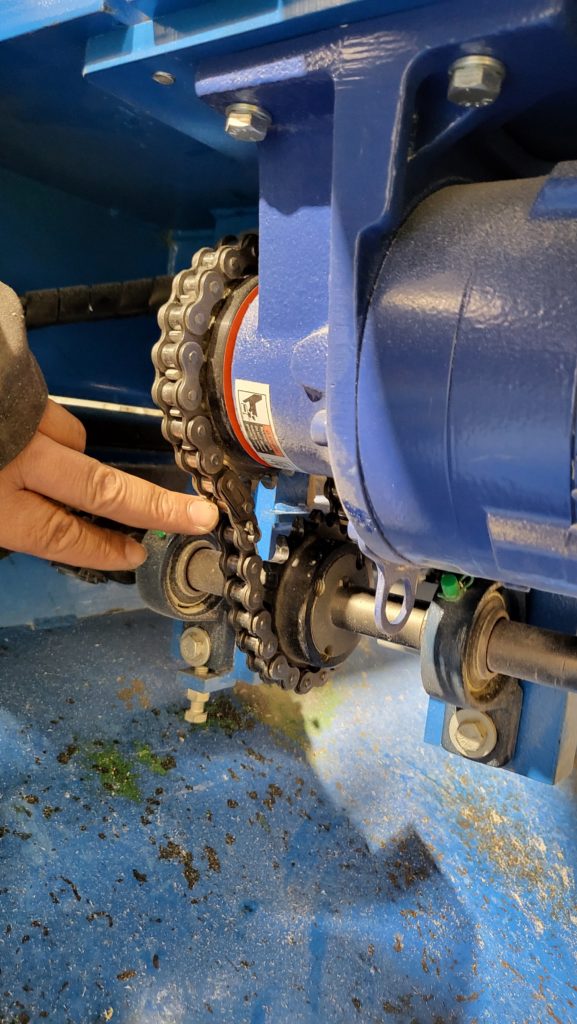
- If the Chain is too loose you will need to loosen (DON’T COMPLETELY REMOVE) the four bolts holding the Carriage drive motor in place and shift it until the chain is tight.
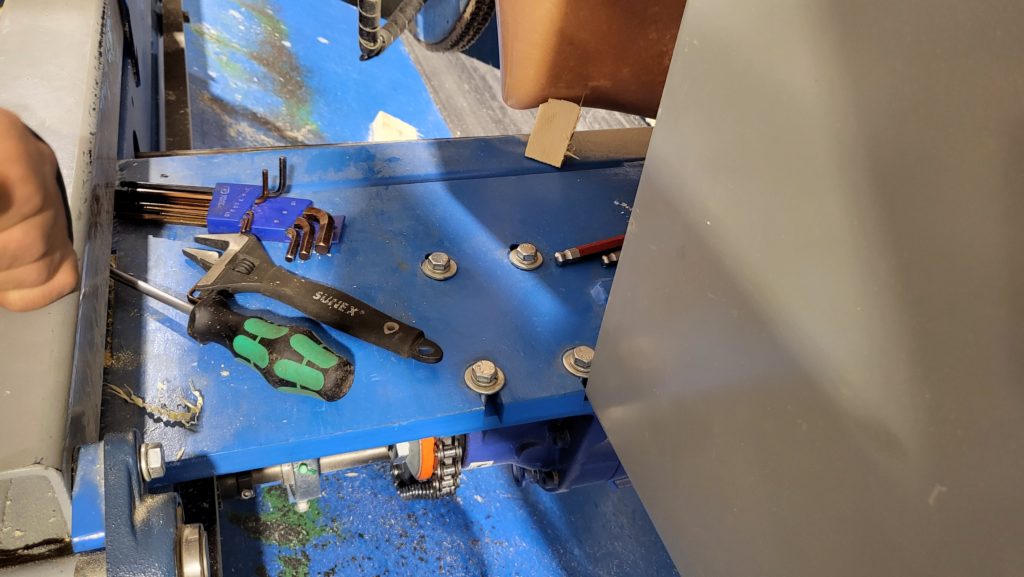
- Step 4: Check the torque tamer.
- The nut on the torque tamer needs to be extremely tight. The metal slip ring needs to be very tight up against the (orange) slip disc. If it is not (the nut is about to fall off in this image) (this is very bad)) then the nut needs to be tightened.
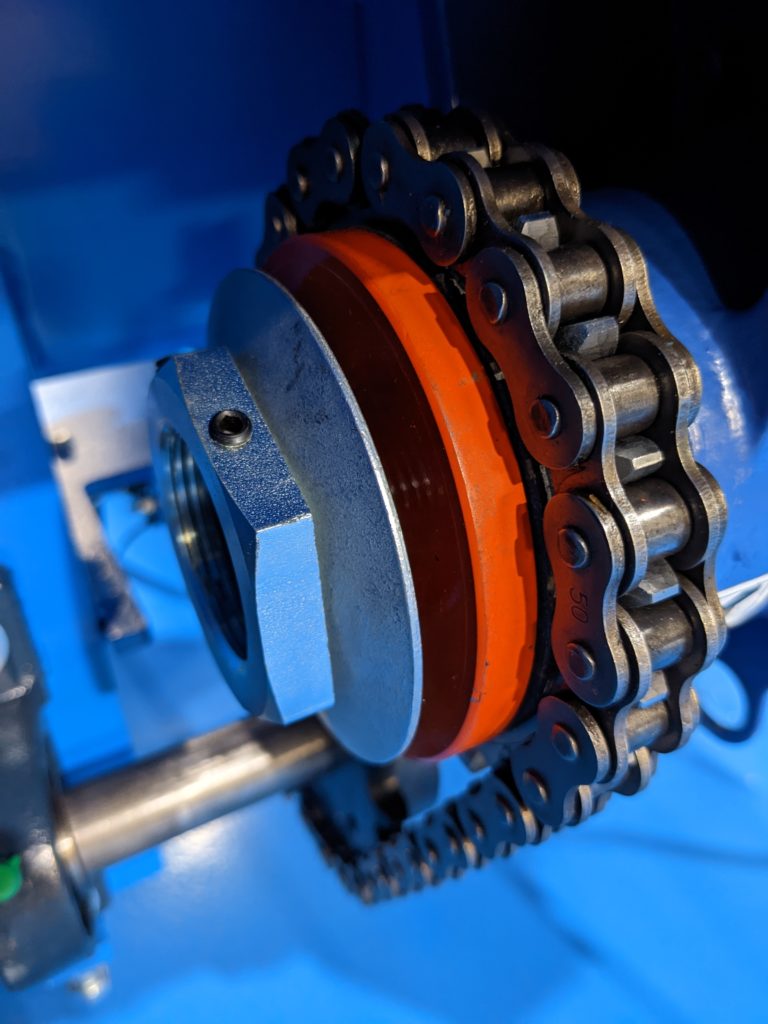
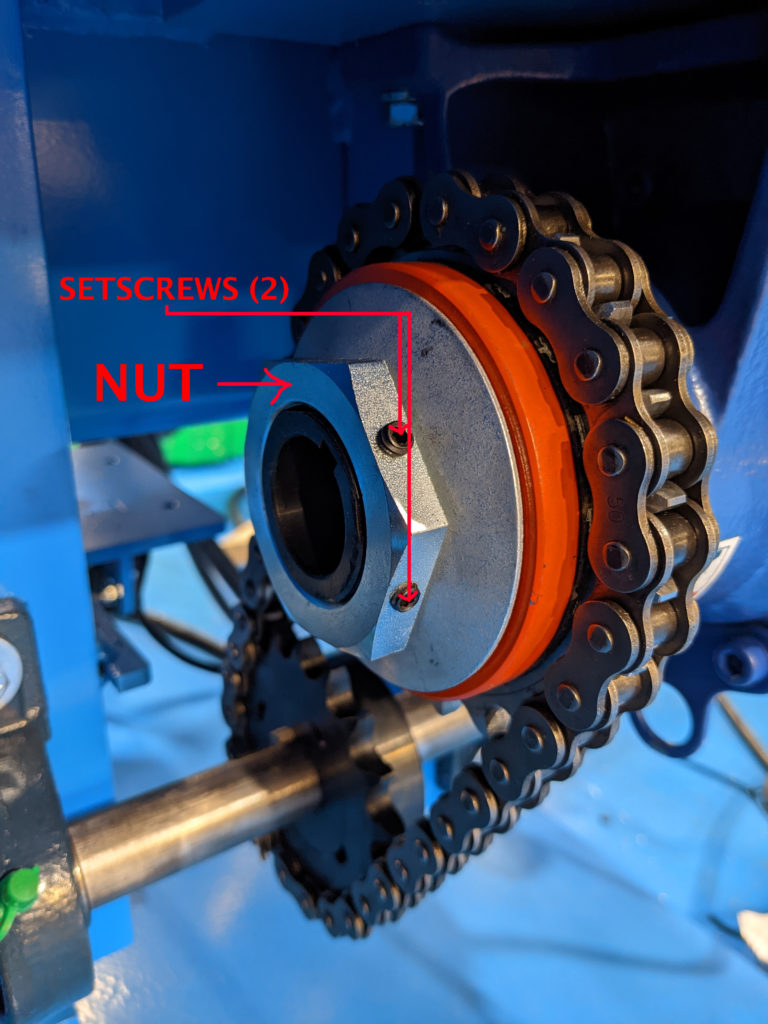
- To tighten the nut you need to loosen A) the two set screws and then B) tighten the nut (as tight as you can) using a large Channellock or adjustable wrench. After you have gotten the nut as tight as you can, retighten the set screws.
- Step 5: Check that the encoder shaft gear is tight up against the spur gear rack
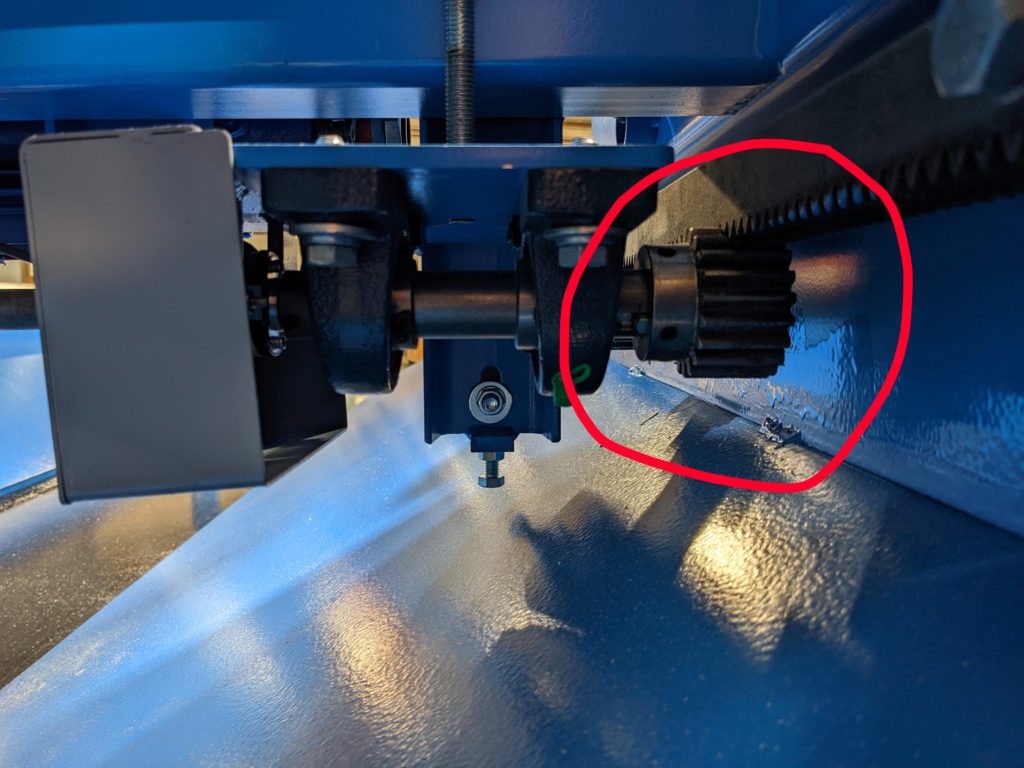
- Step 6: Remove the encoder’s protective cover and check if either of the metal tabs that hold the encoder in place are broken AND that the set screw is tight. (See Images below)
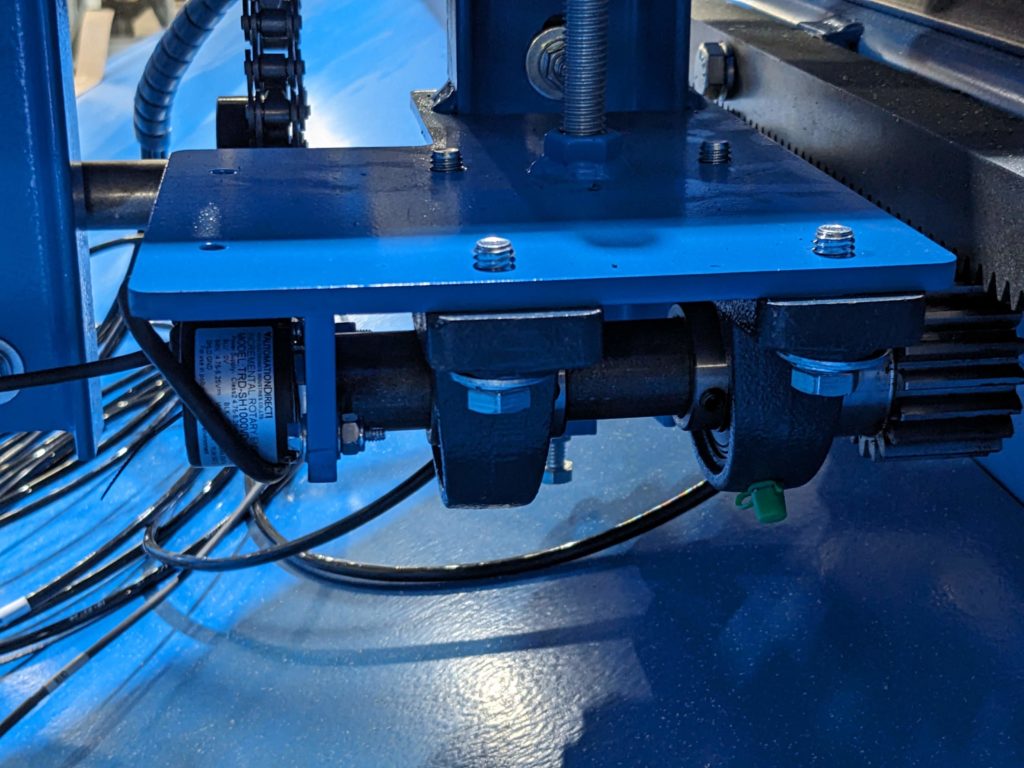
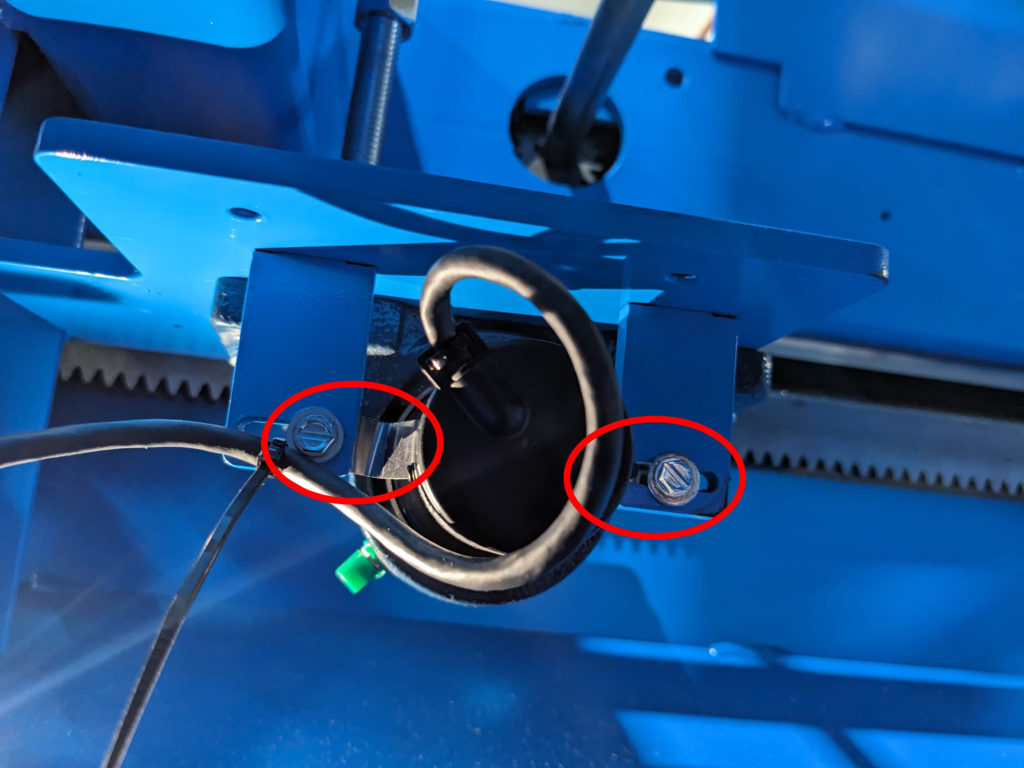
There are two styles of encoders whichever one you have make sure the set screw is tight so it isn’t slipping.
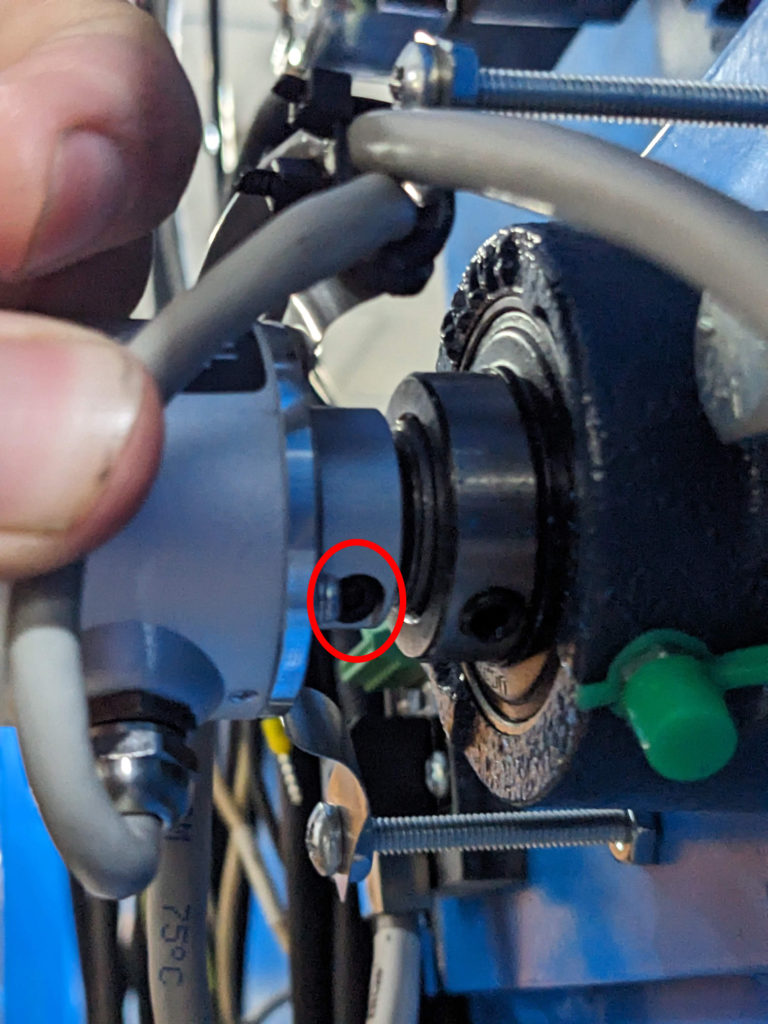
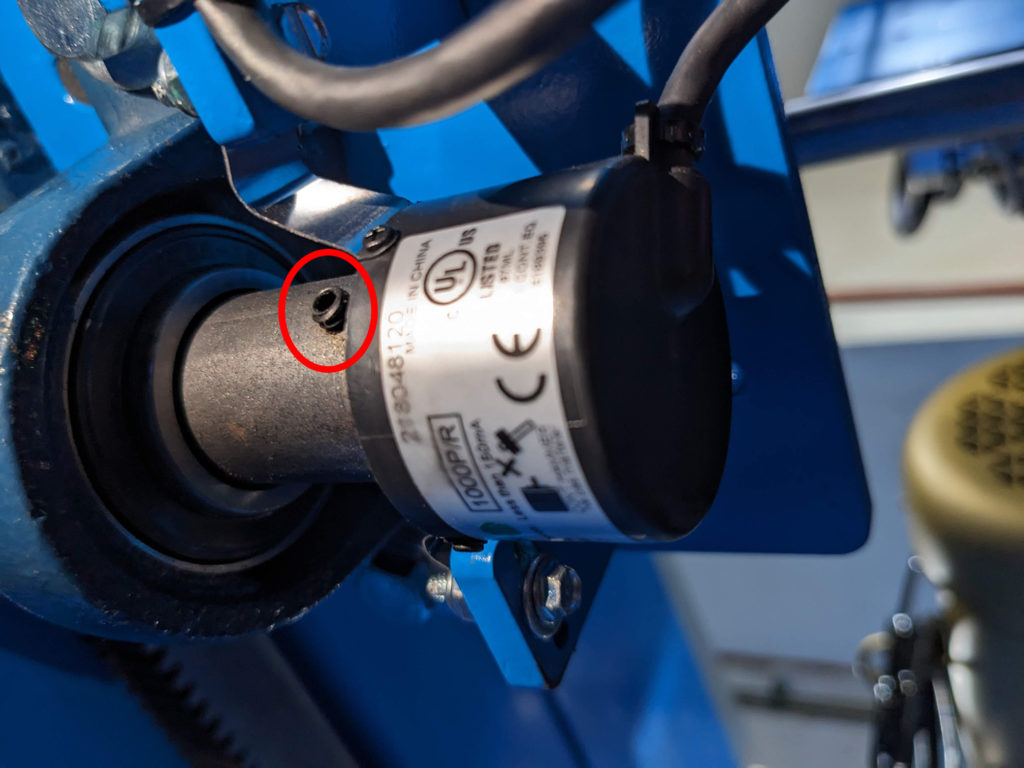
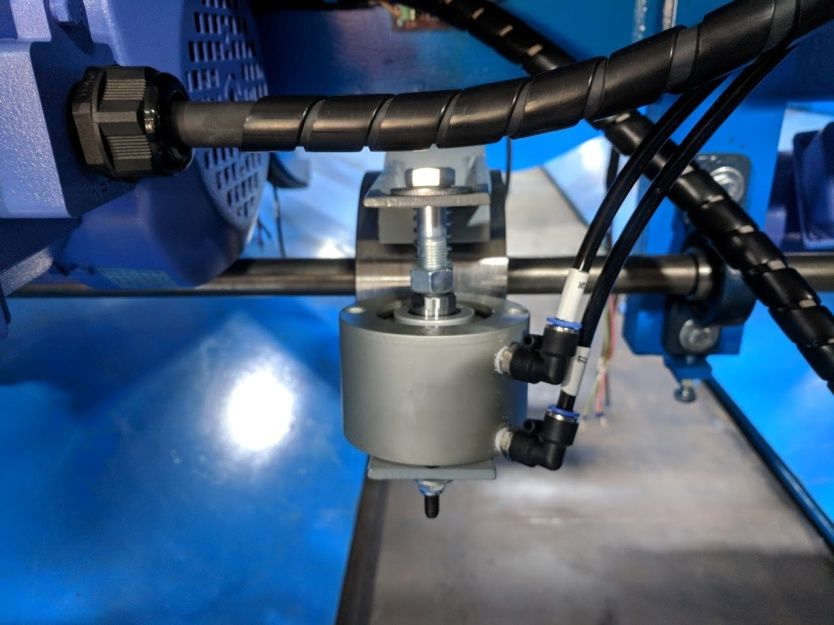
- Step 7: Check that the air brake is not dragging when it’s moving.
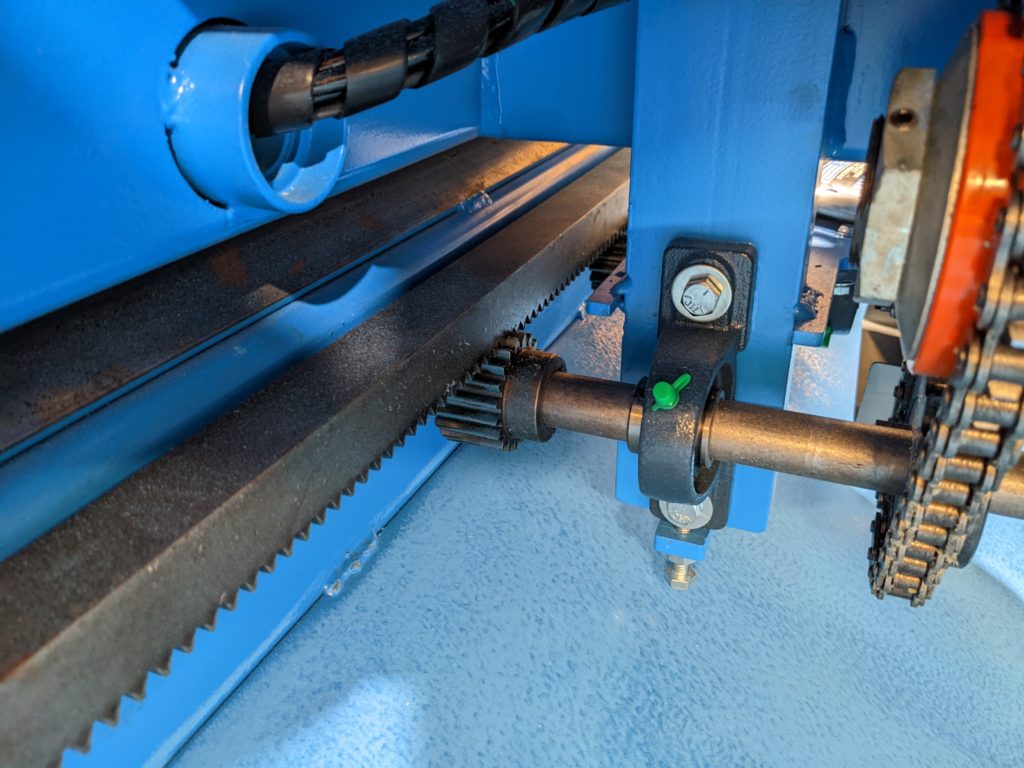
Step 8: Check both of the spur gears on either end of the carriage shaft for obstructions, dust or damage to the gears themselves. NOTE this is a different gear on a different shaft to the one we already checked above.
Confirm the Result
After restoring the machine through the approved startup procedure, confirm that the position or count changes in the correct direction, returns consistently, and reaches the commanded value without an encoder, calibration, or overrun warning.
Escalate When
If the issue remains, record the exact on-screen message, affected component, indicator-light state, and the last change made. Provide those details to Enventek Technical Support; do not repeatedly recalibrate or replace parts without identifying the cause.