Search for answers or browse our knowledge base.
-
Retro C
-
-
- Articles coming soon
-
- How to Replace the Retro C's Computer
- Configuring the Touchscreen Computer's "Power-On"
- How to replace micro USB on the display computers
- How To: Transfer Files to the Retro C
- How to replace the USB hard drive on the touch screen computer
- New computer set bios power on
- Old computer set bios to power on
- TouchScreen Flip / Mirror Issue
-
-
-
- Stuck Angle or Centerline - How to Recover & Recalibrate
- Replacing an Angle Encoder
- Angle movements over run when going to position.
- Angle (Arch) Movements - Overview
- Angle Chains - Proper Chain Tension
- Diagnosing Unknown Noises Coming from Blade Motor
- Pivot Point Check
- Power or Wiring Troubleshooting for Angle Motors or VFDs
- Dirty Slide
-
- Stuck Angle or Centerline - How to Recover & Recalibrate
- How To: Calibrate Centerline 1-5
- How To: Calibrate Centerline 1-5 (Advanced)
- Centerline (Vertical) Movements - Overview
- Replacing a Centerline Encoder
- Replacing a Centerline Gearbox
- Checking the Centerline Maximum & Minimum (Max & Min) Height Setting
- How to Tighten the Centerline Slides
- How To: Tension The Centerline Chains
-
-
-
- Common Retro C issues and solutions
- Countdown Timer / E-Stop Troubleshooting
- Scrap Belt or Scrap Incline VFD Disconnected: Troubleshooting
- Stuck Angle or Centerline - How to Recover & Recalibrate
- TouchScreen Flip / Mirror Issue
- Troubleshooting: Encoder Unplugged Error
- Troubleshooting: The Stationary or Carriage Side Horizontals Won't Move Anymore
-
-
Linear Pickline
-
Plant One Projection
-
SmartConveyor
-
Sticker Printer
Replacing the Carriage Encoder
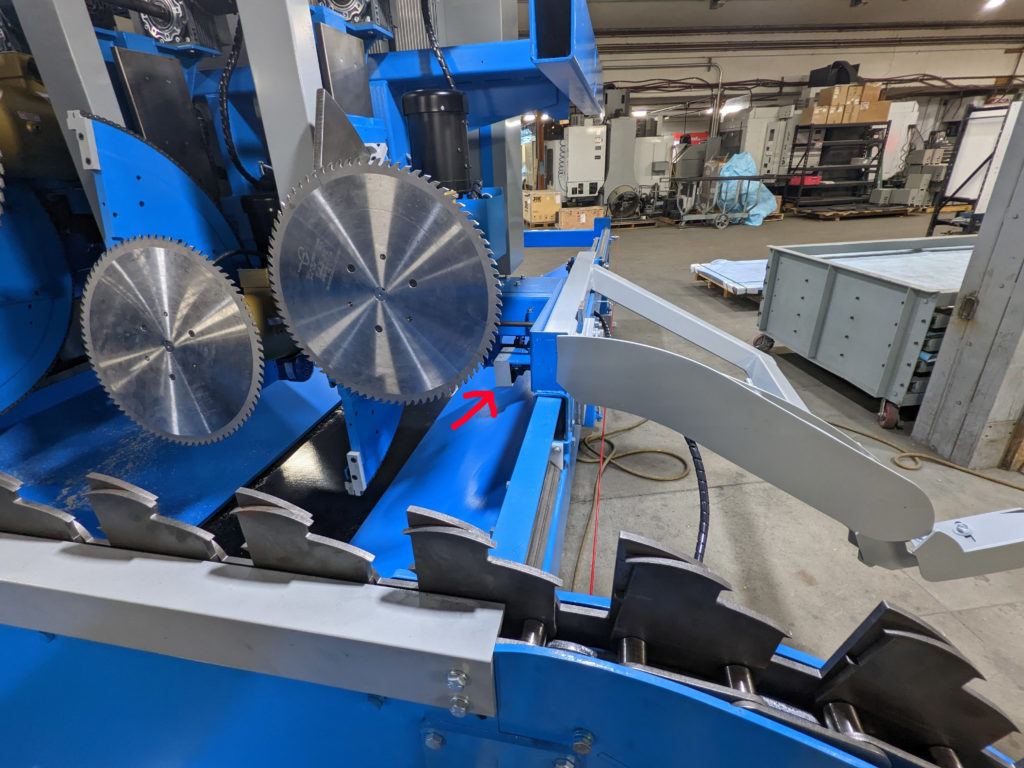
The Carriage encoder is located under a gray cover (see photo below) under the carriage on the lumber feed side of the saw.
If you think the carriage encoder is bad and needs to be replaced follow these steps to replace it.
Warning: Before entering the saw make sure you have engaged the emergency stop with the key and take it with you as well. Always lock out, tag out the machine during maintenance in accordance with all local and/or company policies.
- Step 1: Remove the two bolts that hold the gray cover in place (they are accessible from the top)
- Step 2: You will need to cut the zip tie and remove the two screws that hold encoder in place.
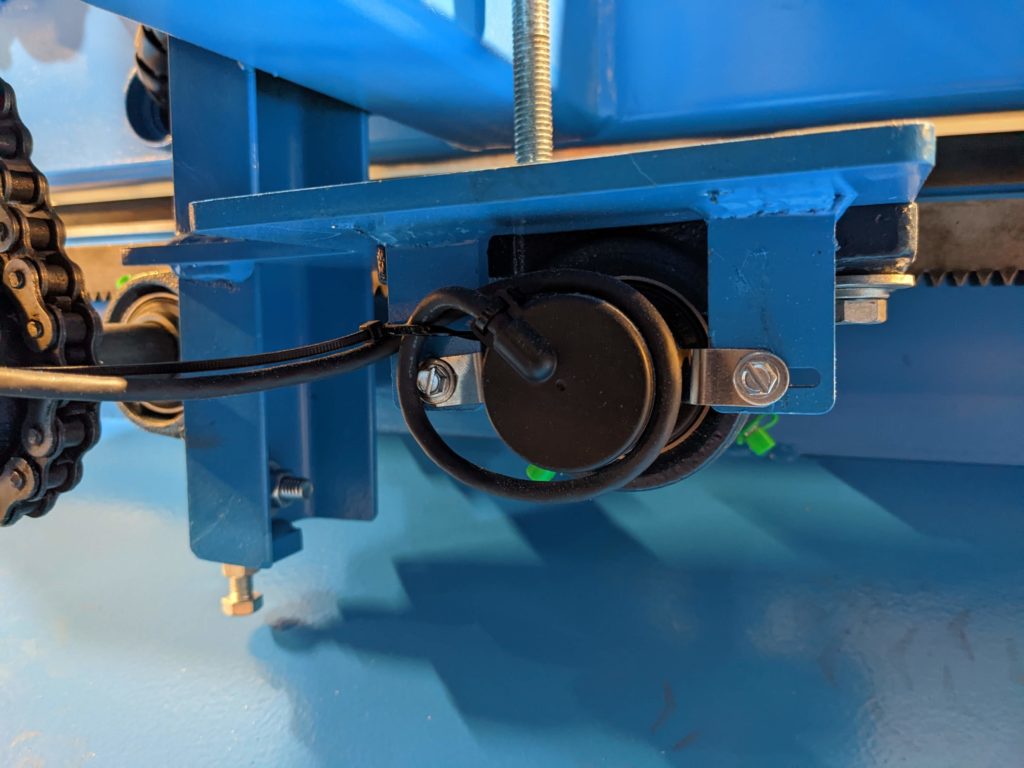
- Step 3: Loosen the set screw. NOTE: the set screw might be in a place that you can’t see easily due to its rotation around the shaft/the position of the carriage.
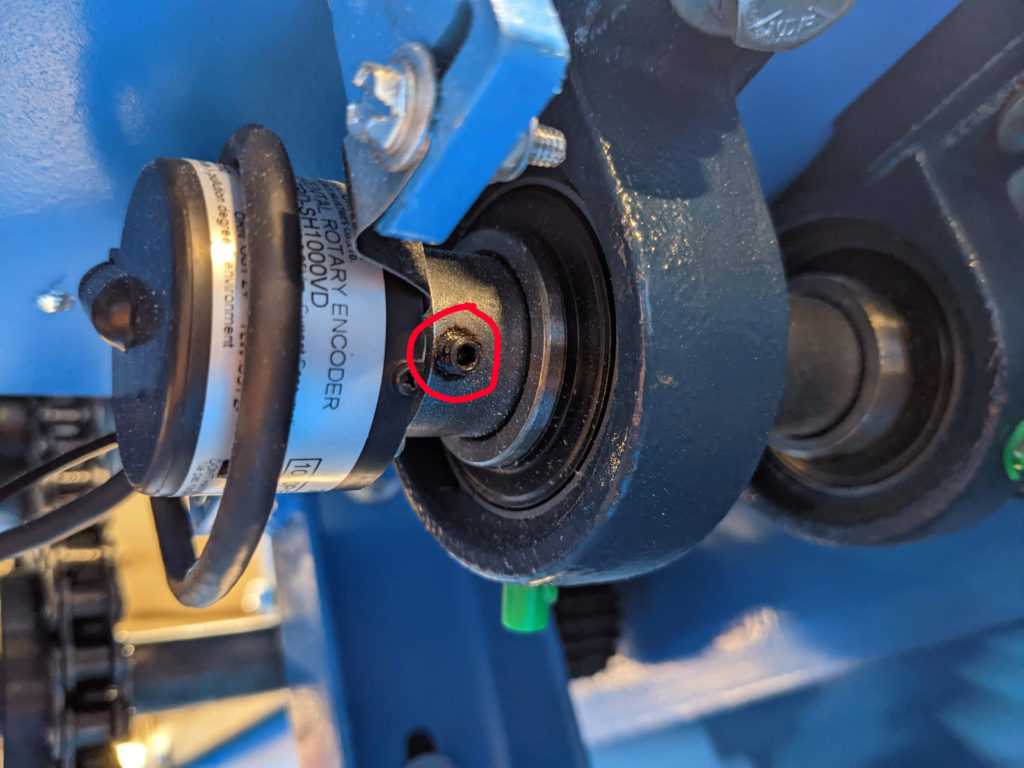
Slide the encoder off and replace with a new encoder. Repeat steps 1-3 in reverse order
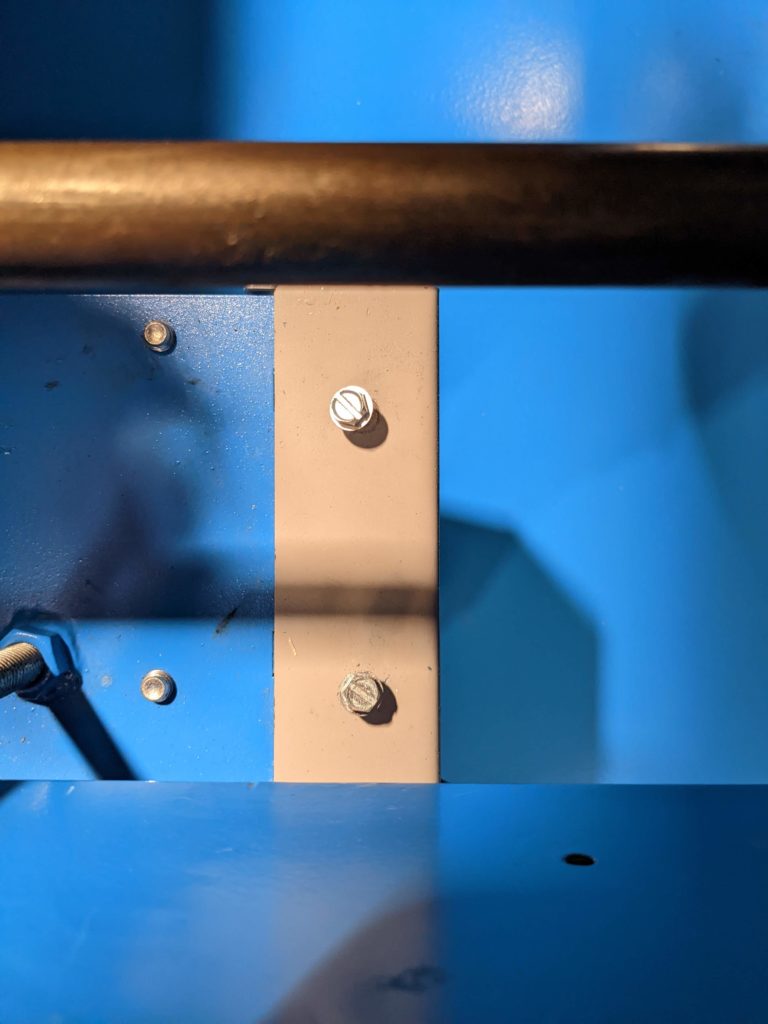
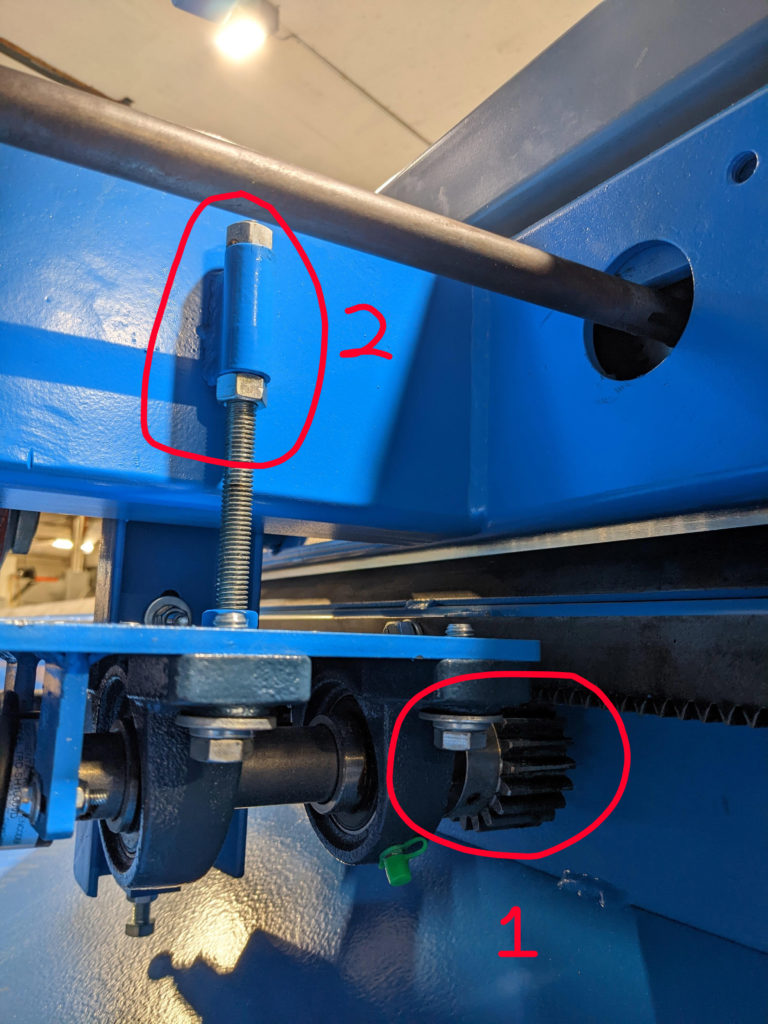
ADDITIONAL TIP:
Now is a good time to verify that the encoder’s gear is tight up against the gear rack. If the is any slop in the gears (see photo, position 1) then you will need to tighten the gear up. To do so loosen the lock nut and tighten top nut (see number 2).
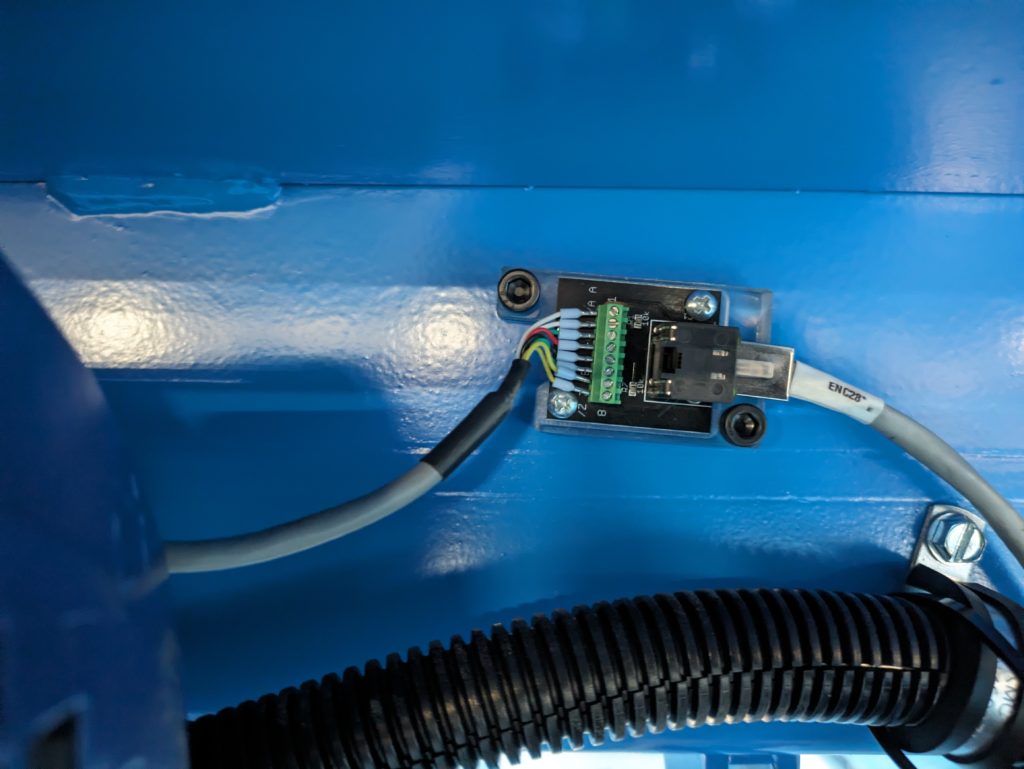
Now, let’s connect the encoder wire to the wiring block situated on the opposite side of the Carriage’s support tube. You’ll find it positioned above the carriage brake, similar to the reference image provided.
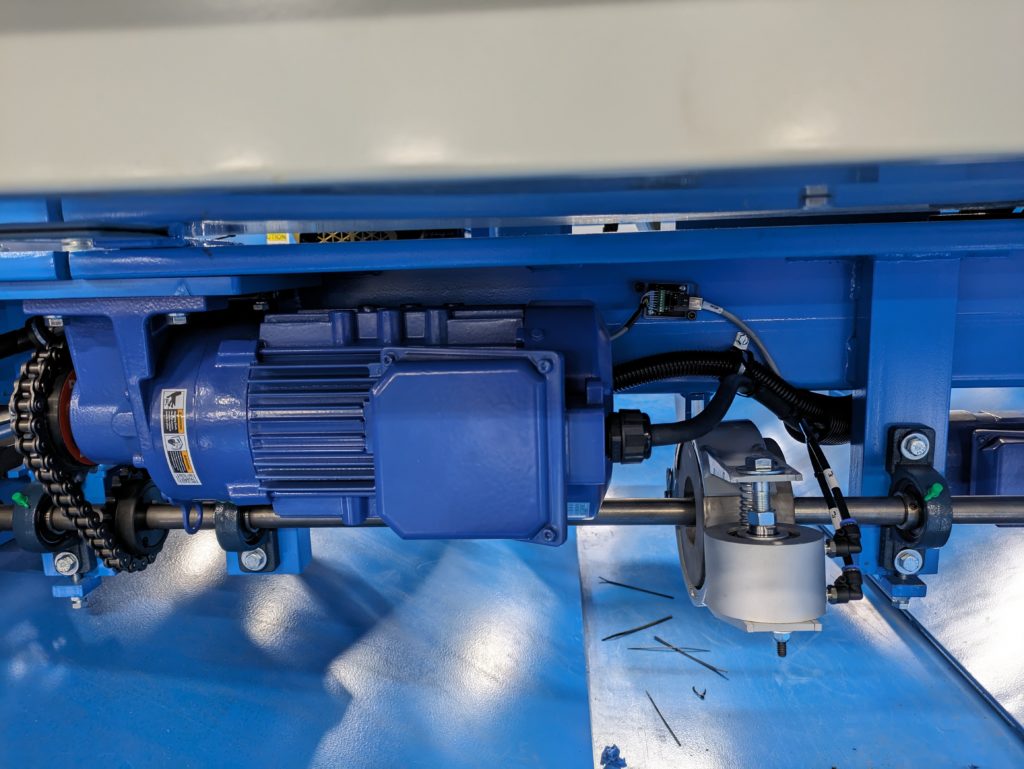
The wiring should be wired either into this block or added with the screws if replacing the block fully. Wiring block instructions