How Can We Help?
Search for answers or browse our knowledge base.
-
Retro C
-
-
- Articles coming soon
-
- How to Replace the Retro C's Computer
- Configuring the Touchscreen Computer's "Power-On"
- How to replace micro USB on the display computers
- How To: Transfer Files to the Retro C
- How to replace the USB hard drive on the touch screen computer
- New computer set bios power on
- Old computer set bios to power on
- TouchScreen Flip / Mirror Issue
-
-
-
- Stuck Angle or Centerline - How to Recover & Recalibrate
- Replacing an Angle Encoder
- Angle movements over run when going to position.
- Angle (Arch) Movements - Overview
- Angle Chains - Proper Chain Tension
- Diagnosing Unknown Noises Coming from Blade Motor
- Pivot Point Check
- Power or Wiring Troubleshooting for Angle Motors or VFDs
- Dirty Slide
-
- Stuck Angle or Centerline - How to Recover & Recalibrate
- How To: Calibrate Centerline 1-5
- How To: Calibrate Centerline 1-5 (Advanced)
- Centerline (Vertical) Movements - Overview
- Replacing a Centerline Encoder
- Replacing a Centerline Gearbox
- Checking the Centerline Maximum & Minimum (Max & Min) Height Setting
- How to Tighten the Centerline Slides
- How To: Tension The Centerline Chains
-
-
-
- Common Retro C issues and solutions
- Countdown Timer / E-Stop Troubleshooting
- Scrap Belt or Scrap Incline VFD Disconnected: Troubleshooting
- Stuck Angle or Centerline - How to Recover & Recalibrate
- TouchScreen Flip / Mirror Issue
- Troubleshooting: Encoder Unplugged Error
- Troubleshooting: The Stationary or Carriage Side Horizontals Won't Move Anymore
-
-
Linear Pickline
-
Plant One Projection
-
SmartConveyor
-
Sticker Printer
< All Topics
Print
Replacing a Horizontal Encoder
Updated
Tools Needed: Phillips Head Screwdriver, 3/8” Socket Wrench
Time: 10 min
People: 1
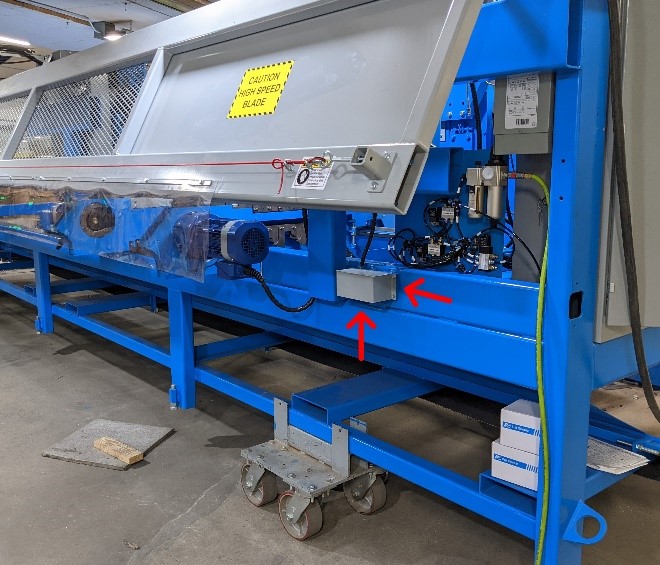
Step 1: Locate the rotary encoder on the rear of the saw that you need to replace. NOTE: There are two encoders, one for each side (even though only one is shown here). You will need to remove the cover to access and replace the encoder.
TIP: Many of the encoders on the Retro C component saw are covered by gray covers.
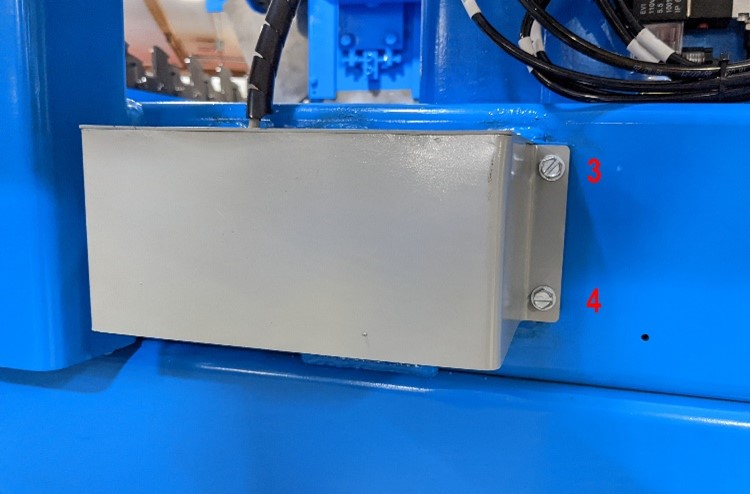
Step 2: Remove the (4) bolts using a 3/8” socket wrench.

Step 3:
- Remove the zip tie, making sure NOT to cut the wires.
- Use a Phillips head screwdriver to remove the two screws holding the rotary encoder in place.
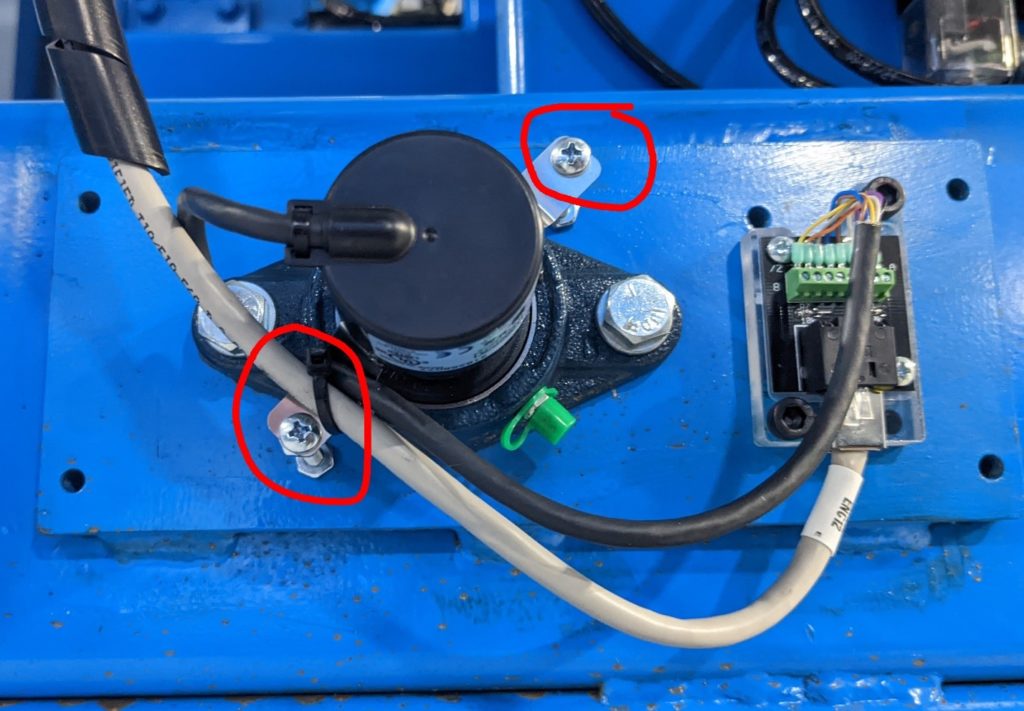
- Remove the rotary encoder that has stopped working properly.
- Measure the length of the wire and cut it to match the wiring block
- Wire encoder to the encoder block. Wiring Block instructions
- Re attach encoder as it was removed.
- Re-attach screws and zip tie wires to the unit as shown above.
- Replace the gray cover using the original bolts.
All Done!
Table of Contents