Search for answers or browse our knowledge base.
-
Retro C
-
-
- Articles coming soon
-
- How to Replace the Retro C's Computer
- Configuring the Touchscreen Computer's "Power-On"
- How to replace micro USB on the display computers
- How To: Transfer Files to the Retro C
- How to replace the USB hard drive on the touch screen computer
- New computer set bios power on
- Old computer set bios to power on
- TouchScreen Flip / Mirror Issue
-
-
-
- Stuck Angle or Centerline - How to Recover & Recalibrate
- Replacing an Angle Encoder
- Angle movements over run when going to position.
- Angle (Arch) Movements - Overview
- Angle Chains - Proper Chain Tension
- Diagnosing Unknown Noises Coming from Blade Motor
- Pivot Point Check
- Power or Wiring Troubleshooting for Angle Motors or VFDs
-
- Stuck Angle or Centerline - How to Recover & Recalibrate
- How To: Calibrate Centerline 1-5
- How To: Calibrate Centerline 1-5 (Advanced)
- Centerline (Vertical) Movements - Overview
- Replacing a Centerline Encoder
- Replacing a Centerline Gearbox
- Checking the Centerline Maximum & Minimum (Max & Min) Height Setting
- How to Tighten the Centerline Slides
- How To: Tension The Centerline Chains
-
-
-
- Common Retro C issues and solutions
- Countdown Timer / E-Stop Troubleshooting
- Scrap Belt or Scrap Incline VFD Disconnected: Troubleshooting
- Stuck Angle or Centerline - How to Recover & Recalibrate
- TouchScreen Flip / Mirror Issue
- Troubleshooting: Encoder Unplugged Error
- Troubleshooting: The Stationary or Carriage Side Horizontals Won't Move Anymore
-
-
Linear Pickline
-
Plant One Projection
-
SmartConveyor
-
Sticker Printer
Replacing a Material Feed Encoder
Location
The material feed encoders are located inside the extended fan cover of the motor that runs the dogs through the saw.
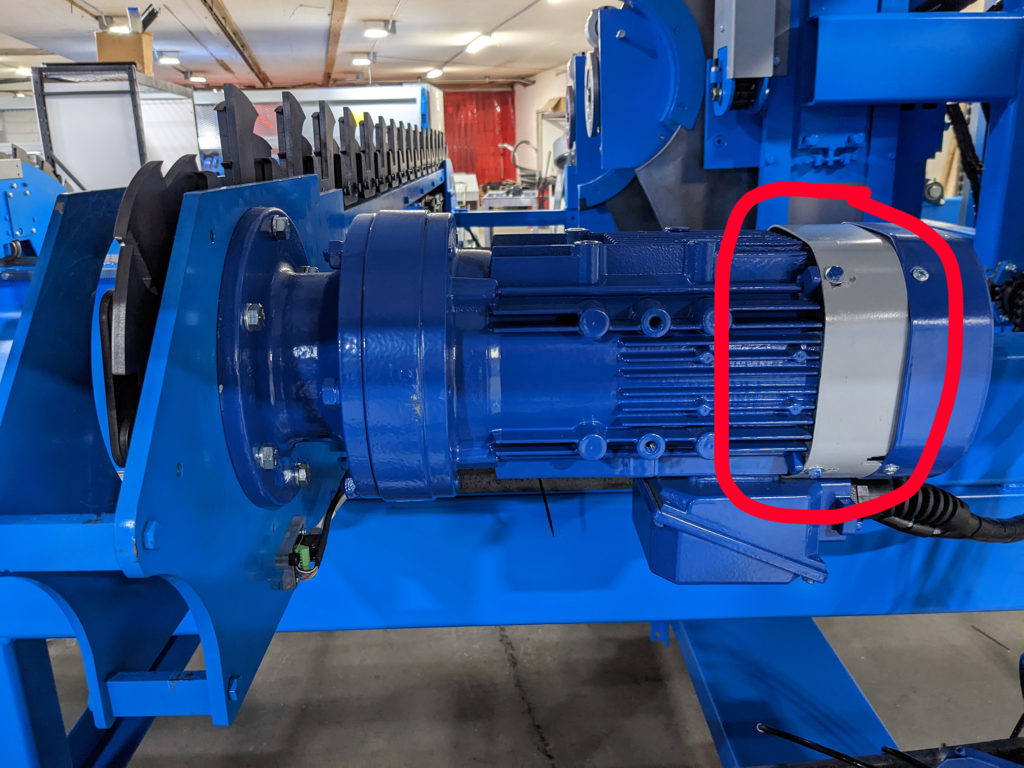
NOTE: The encoders work to synchronize the two sides of the Retro C. If the saw loses synchronization or stalls it could be something mechanical, it may be that one of the encoders is starting to fail or it could be the connection of the encoder to the motor has broken.
STEP 1: Check for mechanical issues such as stalls or load issues. In order to check the load you will want to look in the calibration window for this material feed arm (NOTE: there are two sides & two encoders so you will need to look at each side separately). If the conveyor will run in sync with each other with no lumber in it try doing that first and check the load on the VFD drive.
If they can’t be run in sync with each other they can be checked by running them independently in the settings for each side.
Remove Encoder
- Lock out the Emergency stop on the machine.
- Remove the fan cover
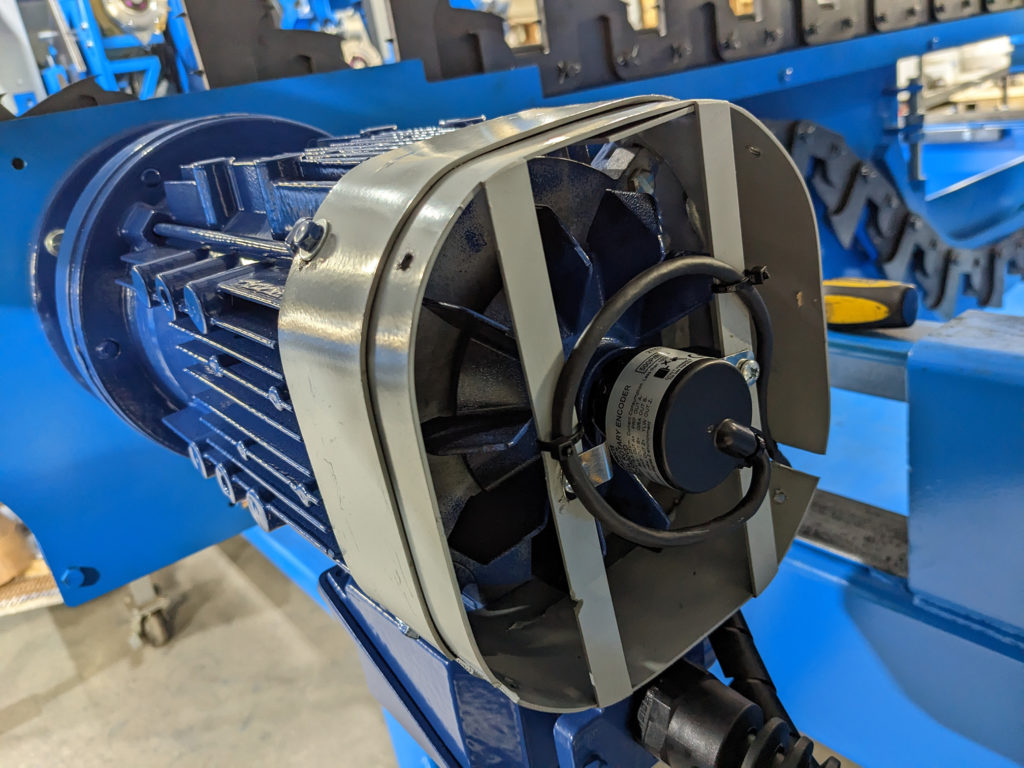
- Inside the encoder will be located.
- Inspect for anything that could cause the encoder to malfunction
- One or both of the metal tabs/clips that hold the encoder in place could be broken.
- The set screw could be loose and the shaft is spinning but the encoder isn’t recognizing it.
- Remove the (2) screws on the spring clip that attach the encoder to the motor
- Remove the set screw for the encoder. NOTE: the set screw is recessed and not fully seen here.
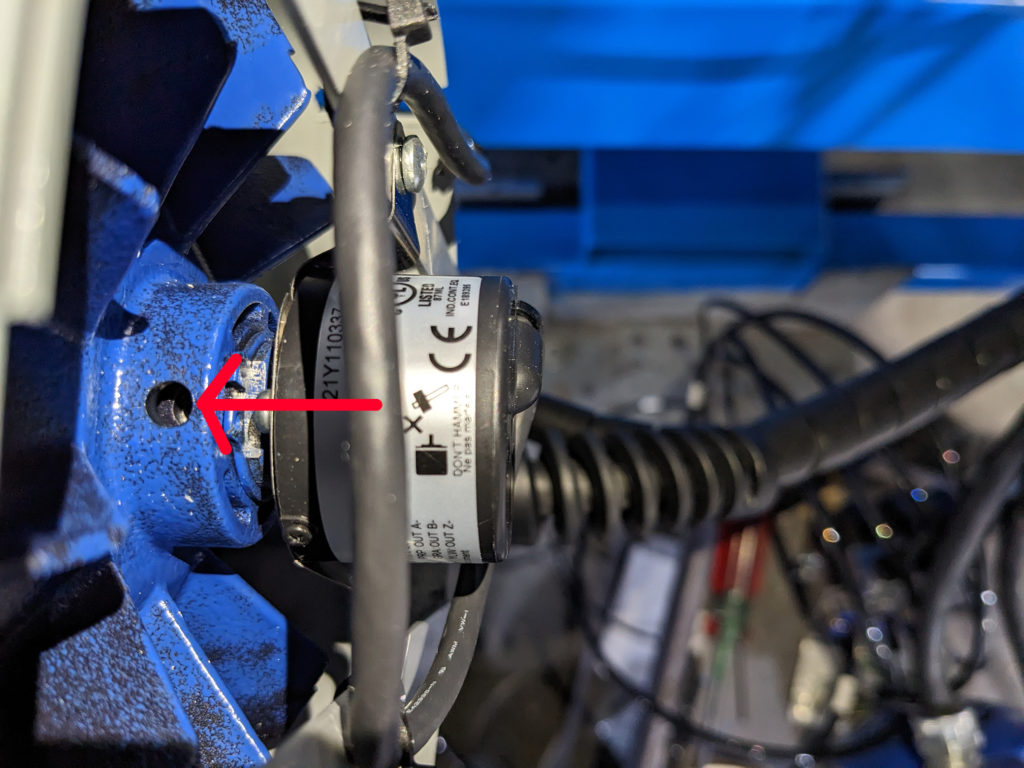
5. Remove the encoder by sliding it off of the shaft.
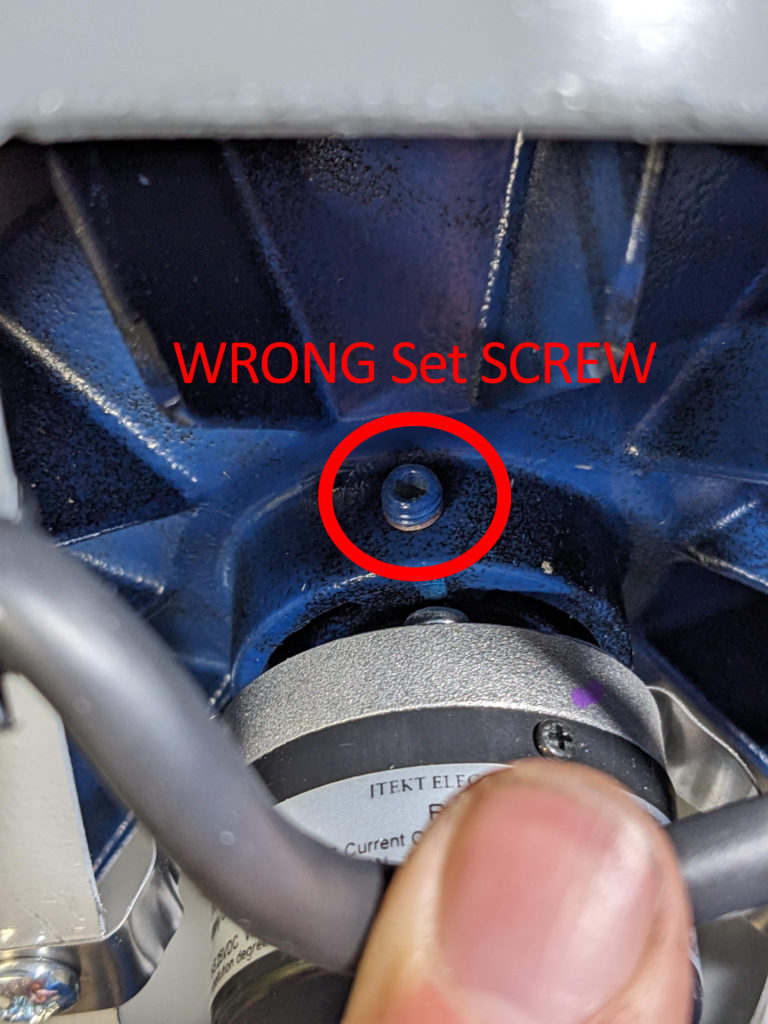
NOTE: Sometimes there have been issues with customers “tightening” the set screw only to find out that the set screw they are tightening isn’t the correct one. See the example below of the wrong set screw.
Install New Encoder
Make sure that the new encoder is a 500 count encoder it has a shaft and looks like this:
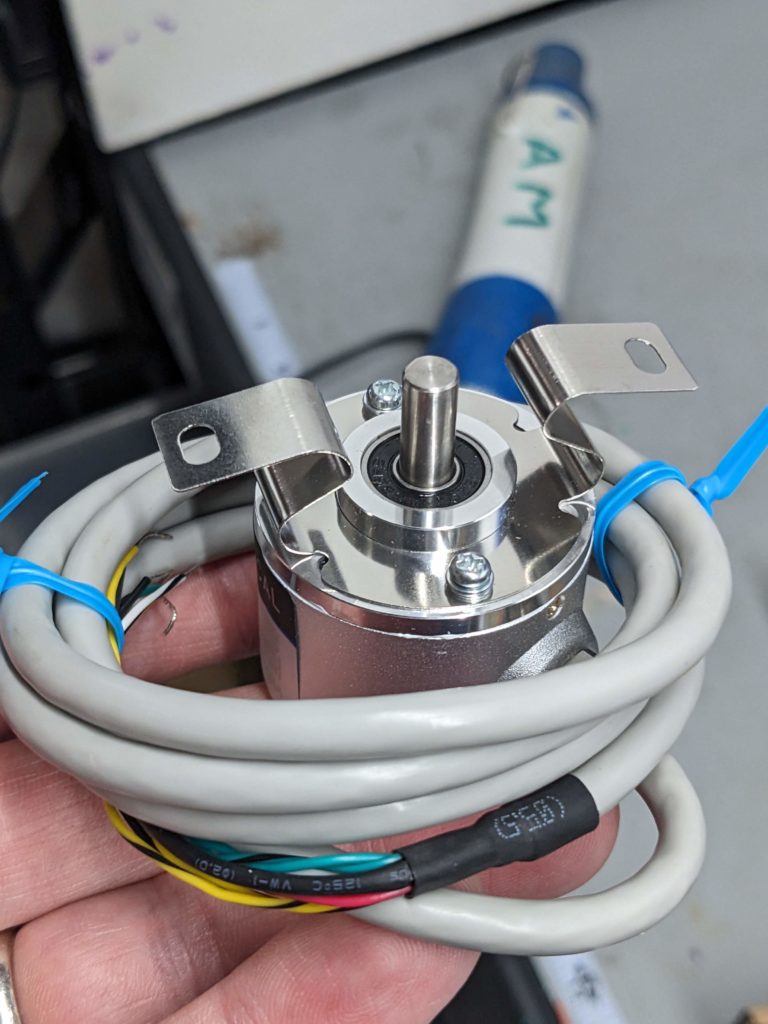
Wire the encoder to the encoder block at the same length as the previous encoder.
Wiring block instructions
Repeat steps 1-5 in reverse order.