Search for answers or browse our knowledge base.
-
Retro C
-
-
- Articles coming soon
-
- How to Replace the Retro C's Computer
- Configuring the Touchscreen Computer's "Power-On"
- How to replace micro USB on the display computers
- How To: Transfer Files to the Retro C
- How to replace the USB hard drive on the touch screen computer
- New computer set bios power on
- Old computer set bios to power on
- TouchScreen Flip / Mirror Issue
-
-
-
- Stuck Angle or Centerline - How to Recover & Recalibrate
- Replacing an Angle Encoder
- Angle movements over run when going to position.
- Angle (Arch) Movements - Overview
- Angle Chains - Proper Chain Tension
- Diagnosing Unknown Noises Coming from Blade Motor
- Pivot Point Check
- Power or Wiring Troubleshooting for Angle Motors or VFDs
-
- Stuck Angle or Centerline - How to Recover & Recalibrate
- How To: Calibrate Centerline 1-5
- How To: Calibrate Centerline 1-5 (Advanced)
- Centerline (Vertical) Movements - Overview
- Replacing a Centerline Encoder
- Replacing a Centerline Gearbox
- Checking the Centerline Maximum & Minimum (Max & Min) Height Setting
- How to Tighten the Centerline Slides
- How To: Tension The Centerline Chains
-
-
-
- Common Retro C issues and solutions
- Countdown Timer / E-Stop Troubleshooting
- Scrap Belt or Scrap Incline VFD Disconnected: Troubleshooting
- Stuck Angle or Centerline - How to Recover & Recalibrate
- TouchScreen Flip / Mirror Issue
- Troubleshooting: Encoder Unplugged Error
- Troubleshooting: The Stationary or Carriage Side Horizontals Won't Move Anymore
-
-
Linear Pickline
-
Plant One Projection
-
SmartConveyor
-
Sticker Printer
How to Replace the Retro C’s Computer
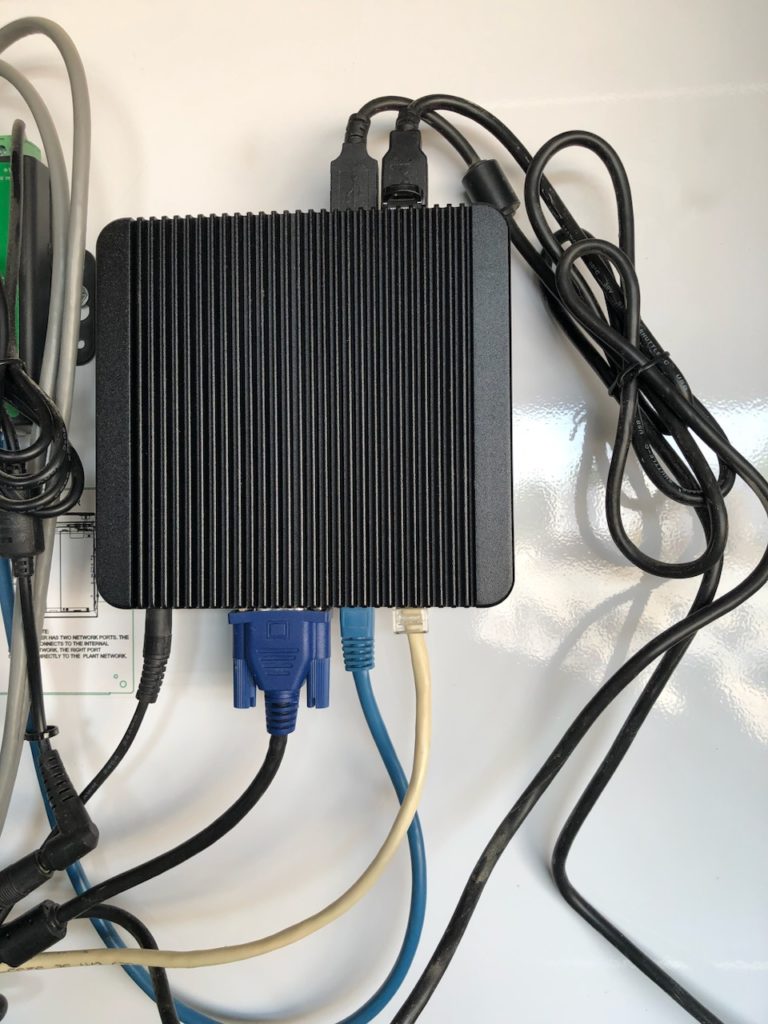
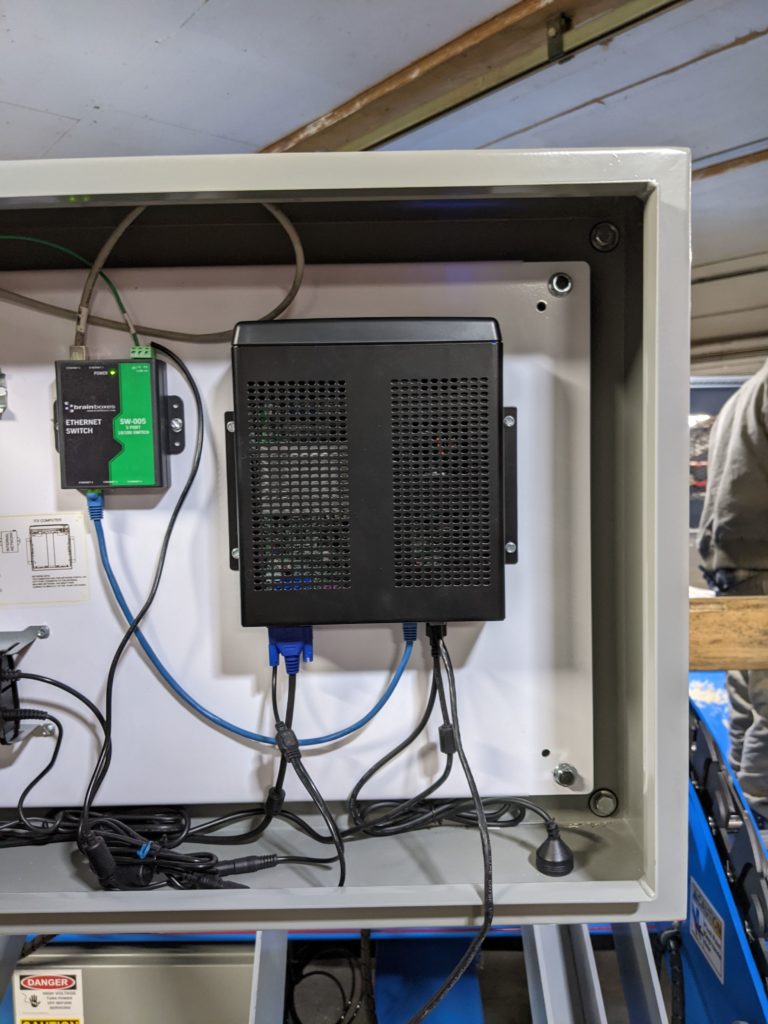
Remove all of the cables, take a picture if needed so you can remember where they go. Don’t forget to remove the USB thumb drive.
Remove the 4 silver screws on the left and right sides of the computer. You will need a 1/4” socket to remove,
Remove the old computer and set aside.
Reinstall the new computer using the 4 screws.
Plugin all the cables as well as the USB thumb drive.
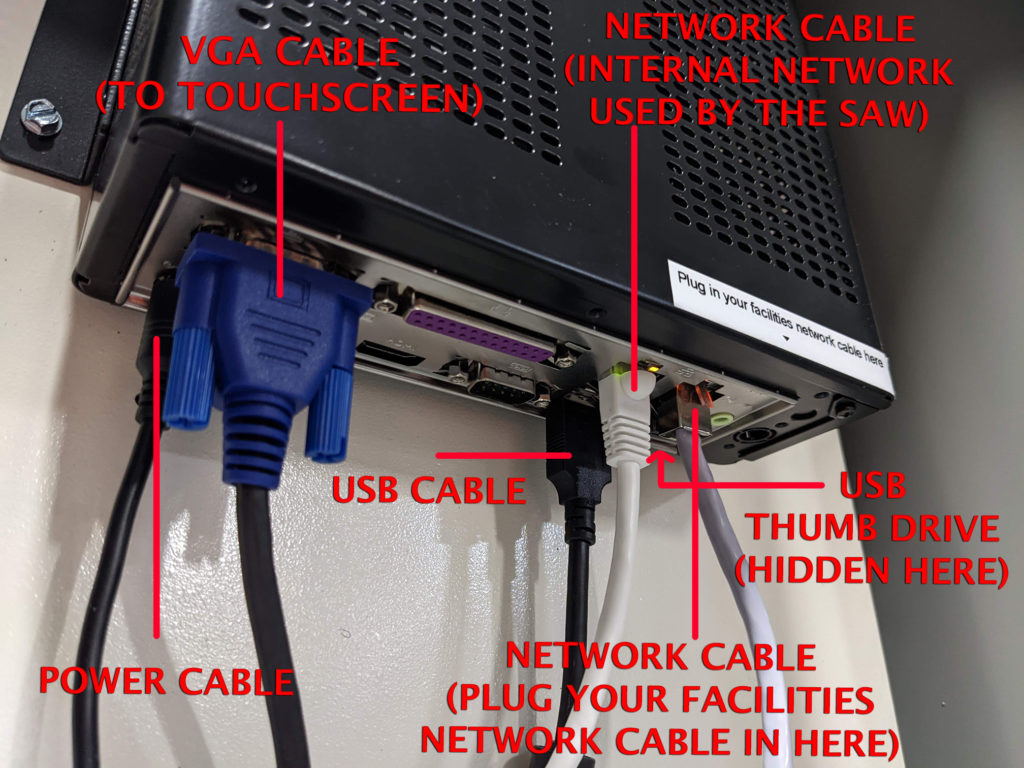
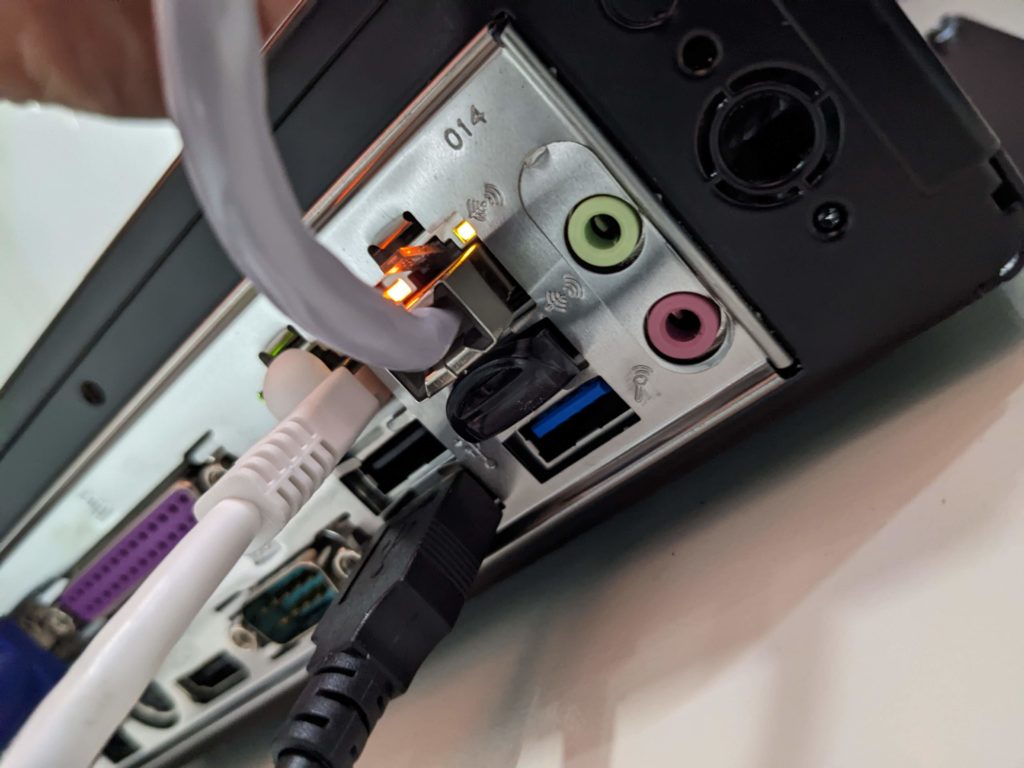
The ethernet cable on the left goes to the ethernet switch next to the computer. Make sure that the ethernet from the office is in the port to the right as the photo below.
Press the power button on the top to power it on.
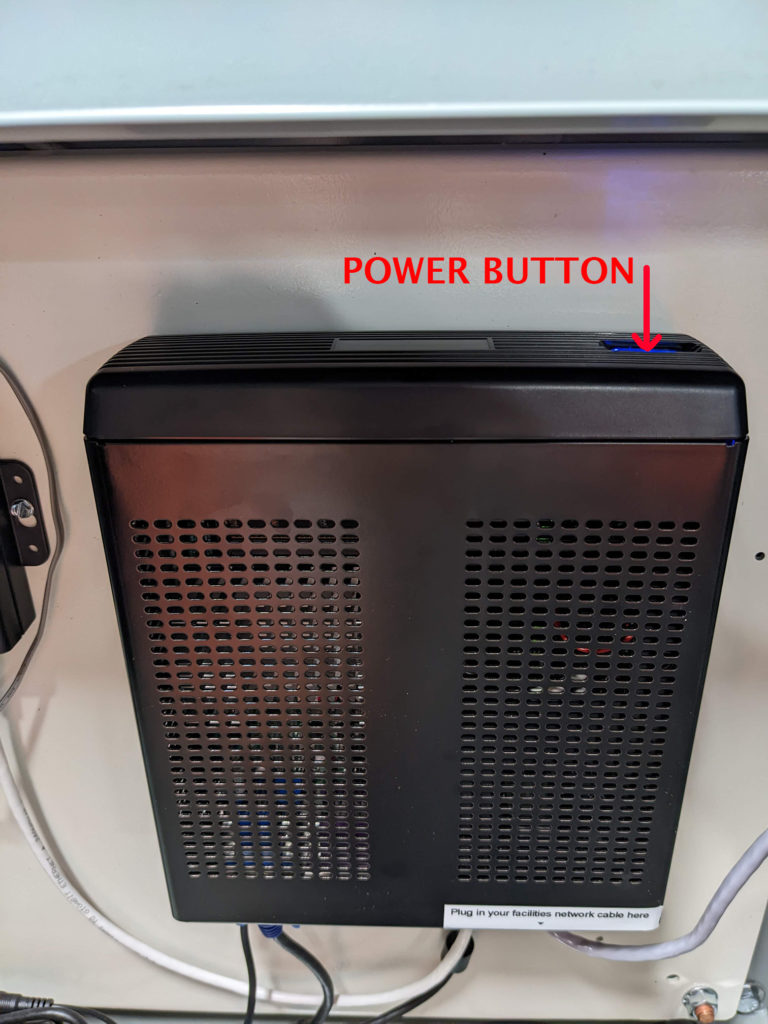
Reminder: Make sure you install the USB drive from the previous machine or if Enventek shipped one with it, the old usb drive will have your previous settings and software preinstalled.
Congratulations you have completed the computer replacement.
Below is the new computer design it is very similar to the older model however it will require a few holes to be drilled in the back panel to mount it.